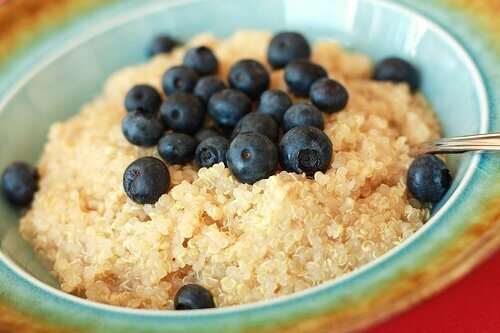
Cook More Real Food: Make a Meal Plan
So far during the Cook More Real Food event we’ve completed inventories of our pantry and of our freezer, and now it’s time to get really practical and a make a plan for what we’ll actually eat with all those foods!
Your Tasks This Week Are:
1. To do a quick 5 minute or less inventory of your fridge.
Honestly, this should be fast. Just scrawl it on some scrap paper if you like. Don’t write down your fridge staples (soy sauce, lemon juice, etc.) but instead write down things like dairy, fresh produce, meat, eggs, etc. that will go bad if it doesn’t get used up!
2. To create a meal plan.
As I mentioned in the video, it can be for just one week, or you could do as I did and make a plan for the entire month. It’s completely up to you. If this is new for you, start a bit smaller so that you can ensure that you’ll be successful.
For those in need of some meal planning assistance, here are a few previous posts to help you out:
Organization in the Real Food Kitchen: Meal Planning
3. Make sure that you reference your pantry, freezer and fridge inventories often as you create your meal plan.
The point of all this is to actually use the foods that you already have, so have a look at the video and see how I did it, and then have a try at it yourself!
One thing that I always find helpful is to look at the ingredients on my inventory and try to think of what meals we love that include those things. I might still need to buy a couple of things to make the recipe work, but at least I’ll use up what I have and it gives me inspiration for what to put in my meal plan.
4. Decide what food you’d like to make next week (June 7/8th) to put in your freezer.
This can be either complete meals, like casseroles, soups, burritos, etc. or it can be meal components, like pre-cooked and seasoned meats, beans, soup broth or anything else that will make your meals come together more quickly and easily.
It’s always good to make some baked goods to freeze as well. Make things that will make breakfasts faster, that will serve as easy snacks, or bake things like bread so that you can just pull a loaf from the freezer when you need it.
I know that I can’t dedicate an entire 2 days, just because of the reality of having 3 little ones at home with me. I will probably take an hour or two each morning, as well as each afternoon. I might also do some work in the evenings once hubby is home or when the kids are in bed. Just do your best to come up with as much time as you can. If you can enlist any help (from a family member, a mother’s helper, your husband, etc.) then do it!
For more help as you begin to plan for your freezer cooking day, here are some amazing resources:
Preparing for Freezer Cooking @ Life as Mom (she is an expert on this topic and this post is FULL of links to very helpful posts on every freezer-cooking related topic you can think of!)
How I Plan My Freezer Cooking @ Money Saving Mom (another freezer-cooking expert, this post also includes wonderfully helpful free printout sheets!)
5. Write a grocery shopping list based on your planning.
One tool that saves me much time and hassle is this grocery shopping checklist. If you have a ListPlanIt membership, you could print one off of there.
6. Reward yourself for your hard work (chocolate, anyone?)!
This will probably take you 2-3 hours over the course of the week. It will probably be easiest to do this by setting aside a couple of chunks of time when you can do the work.
I know that it seems like a lot of planning, but you will be so grateful when you see how much easier your meals come together, and when you find that you are able to shop less and save more money as well!
What is your plan for the freezer cooking days? Please share what you’ll be making, so that we can help each other out with ideas and inspiration!


I am really enjoying this series! The videos have been a lot of fun too. I’m planning to join you for freezer cooking next week.
.-= Stacy @ Delighting in the Days´s last blog ..Number One Way to Delight in your Days =-.
I got my menu and grocery list for the menu done! Not sure yet what I going to make for the freezer next week. Going to have to think about that and add them to the list.
I want to start buying my rice, beans, flour and such as bulk items. There might a a store near me that I can do that with. But I’m not sure what all they have. How can I find somewhere that does that. Most that I’ve found only deliver to the west coast and I’m in WV.
Thank you so much for doing this! It’s really helping me get back on track!
What recipe do you use for GF bread? Thanks.
@Katie, It’s one that my mother-in-law gave me, but I’m not actually sure where it’s from. If I continue to like the recipe, I will find out where she got it and I may post it. Sorry- wish I could just tell you where I got it!
Freezer cooking…ahhh. Last week I made bean burritos. I made the beans in the crock pot one day and rolled them into bean/cheese burritos the next. I also made stromboli which is basically a big rectangle of “5 minutes a day artisan bread” with cheese, seasonings and lunch meat (not the best but better than processed frozen food) laid out on the square.
Then roll it up and pinch the edges and let rise for 30 minutes. Bake at 425 for 25 minutes. Let cool and slice up. Think cinnamon rolls but with meat and cheese.
These are my 2 standbys for quick, filling freezer snacks.
Jana
.-= Jana @ The Summer House´s last blog ..Healthy Sunsreen =-.
Where do you get those bags for your broccoli and cauliflower?
@Mimi, They’re called Moukinet and I got them here http://www.moukisac.com/index.php?id=32. They come in 6 different sizes. They are fantastic, both for in my fridge, and to bring with me when I go produce shopping!
Stephanie~ I have really enjoyed your book and this series. I am so visual that this really appeals to me and I find I am actually not procrastinating about the projects your challenge us with! I inventoried my large chest freezer and basement refrigerator/freezer earlier today and now it’s off to the kitchen frige/freezer and pantry. Thanks so much for taking the time to video this process and share it with us step-by-step. I can’t wait to hear what you think about the “Plan to Eat” software. Thanks again~
Stephanie – I’ve been following your blog for a while now. I love it! I particularly love this series. You are motivating me to go through my pantry and freezer. I’m also going to try to do some freezer cooking with you next week, too. If you have any suggestions on how to freeze foods so that they stay as fresh as possible, I would totally appreciate it. I don’t do a lot of freezer cooking, so I’m not sure exactly if there are any tricks to freezing meals or defrosting them. Thanks!
Great Ideas. Thanks for the info.
Here is a link to purely veggie lasagna, no cheese and no weird processed ingredients: http://fatfreevegan.com/blog/2010/03/11/vegan-lasagna-without-tofu/
I love it. I crave it. And it freezes pretty well. (just fyi- for future batch cooking days!)