Small Batch Dehydrating for the Summer Bounty

There’s a woman who lives a few blocks down from me with this miraculous garden that seems to go from a freshly tilled plot to a wildly abundant gardener’s delight in about one month flat (my husband keeps telling me not to be jealous because she probably uses Miracle-Gro or something of the chemical-sort).
She grows enough teepees full of green beans that I assume she must can and freeze then continually, and eat them weekly all winter and spring.
I, on the other hand, happily grow one bean teepee in my backyard garden. It produces just enough beans for us to eat them as a side dish with dinner every 2-4 days. That said, although we’re green-bean-likers, I wouldn’t say that we’re green-bean-lovers.
(And if you don’t grow or buy green beans, read on, because this can be used for other summer vegetables as well.)

Preserving in Small Batches
I wanted to figure out a way to preserve my excess beans, but had to avoid freezing this year as my freezer is literally jam-packed (ok, maybe not literally- it isn’t full of jam, but rather strawberries, raspberries, blueberries, butter, and grass-fed beef, and did I mention I have 12 whole pastured chickens arriving in 5 days and not a clue where I am going to fit them?).
I settled on dedhyrating them in small batches and I am just thrilled with doing it this way. Here’s why it works for me:
- I can use it for the smallest amount, even just one soup bowlful.
- It takes me 10 minutes flat to go from garden to dehydrator.
- They don’t take up freezer space.
- I store them in a glass jar in my cupboard, and since they shrink down to about 1/3 their previous size they are simple to store indeed.
- As long as you have a dehydrator (any kind will do), you don’t need a speck of special equipment.
Ready to learn how to dehydrate small batches of vegetables?
1. Take whatever veggies you have in abundance (yes, beans, but I’ve also used zucchini, and you could make this work for carrots, turnips, peas, etc.).
2. Start a small pot of water boiling on the stove. (Time= 30 seconds)
3. Chop them into the size that you will use when you are cooking with them in the winter. For my green beans, that’s about 1 inch pieces (to toss into soup, stew, chicken pot pie). For zucchini, I like them diced in small chunks. If you choose carrots, keep in mind that really thick circles will take a long time to re-hydrate when you are cooking with them, so thinner circles or half-circles is a better choice. (Time= 2-3 minutes)

4. Your water should be boiling by now. Toss everything into the pot and set your timer (most veggies will blanche in 2 minutes, but see this post for more information on how to blanche vegetables). (Time= 2-3 minutes)
5. Meanwhile, put some cold water and a handful of ice in a small bowl of container. (Time= the 2 minutes while veggies are on the stove)

6. When the timer goes, take the pot off the stove and pour the contents through a colander, hot water going down the drain. Immediately dump the blanched vegetables into the bowl of ice cold water. Set timer for 2 more minutes. (Time= 2 minutes)
7. Get out a dehydrator tray and once your cold-water timer goes, drain one more time and dump the contents onto your tray. Spread them out evenly. Dehydrate for about 12 hours on the vegetable setting or around 125 F degrees. (Time= 1 minute)
Total time= 9 1/2 -10 1/2 minutes

Finishing Up and Storing Your Food
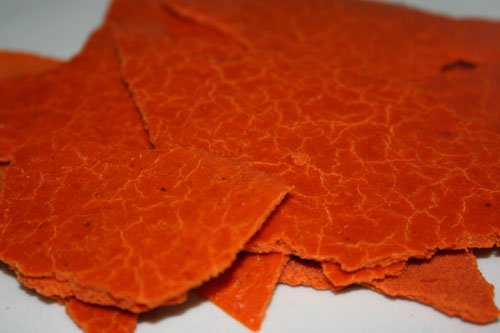
After about 12 hours in the dehydrator (sometimes even less), my beans, zucchini or what-have-you has shrunk to about 1/3 of their original size and dried thoroughly (and I’m sorry I didn’t take a picture of that step). They will feel quite hard, like a dry bean or a piece of uncooked pasta.
I store mine in a glass mason jar. It takes a lot of beans to fill up a jar when they’re so small, so it is quite space-efficient for those with little storage space. It’s just best to keep the jar out of the light to help preserve the quality of your food.
When you go to use them, just think of how much you want in your recipe and go backwards, considering how much smaller your finished product was than what you started with. For example, if I want 1 cup of chopped beans, I’ll use 1/3 cup dried beans. If you think you’ll forget, put a note on your jar with a sticker or piece of masking tape, reminding you of the correct ratio.


Interesting! I never thought of this. I always freeze my green beans but am afraid if the power goes out I would lose them all. Thanks for the tip.
Thank you for sharing! I am wanting to start dehydrating.
I joined a CSA this year & have had assorted bunches of herbs & vegetables every week that I had no idea how to use or preserve. Researching, I came across herbes sallees, a mix of chopped vegetable/herbs and salt that you keep in a jar in the refrigerator. This is great for a fresh-tasting (salty)seasoning! I just used celery, carrot, onion, and any herb I had & processed it to chop it up, then mixed it with pickling salt and put it in a jar with a layer of salt. It can be added to every week, and I suppose I should stir it but don’t always. The salt seems to dry out the vegetables & they keep their color. I have also processed a few carrots, celery, onion, okra batches with whatever herb & put the goop in snack baggies in a larger freezer bag flat on the floor of my refrigerator freezer. It takes up hardly any space but works for a quick supper when I want to keep some chicken breasts from drying out while warming them (I cook them & freeze in meal-size packets) or for soups. I’m without a large freezer this year & exploring my options with canning but lack a dehydrator. Fun adventures!
I would have to use my oven, but I am not sure that it goes down to a low enough temperature. Still mainly relying on my freezer, and learning to do some canning, too. Those beans are such scrumptious colours!
@Root and Twig, They’re a mix of yellow, purple and green. I love them!
My husband sells a product MUCH better than MG that you mention at the beginning of this post. It is completely organic and actually rebuilds the soil rather than just adding a few things to it every year. I would love to share this with you. It is less expensive than putting on “tons” of nasty fertilizer. It increases yields substantially. It is safe for even your little ones and pets.
@Jedonne, Don’t worry, I never use Miracle-Gro! That’s more of a joke between my hubby and I because he knows I would never dream of using something non-organic like that. 🙂 I definitely only stick with high quality, organic fertilizers or compost/manure for my own garden.
please look up Soilsecrets.com and see how you can quit breaking you back putting on fertilizers over and over and fix the soil back like God intended it to be! If you like what you see, contact me. I got four good ears of corn on one stalk!
can you dehydrate green beans without blanching them first? Does that keep them lasting longer?
@Kathryn, You could, but you would risk the taste/color/texture not remaining as nice. This definitely helps to preserve a better end product. Since it’s so quick and easy to do, I’m happy to do it since I know I will ultimately cook the beans anyways.
we got the blessing of 42lbs of free blue berries this year (so glad Hub is a fast picker!).
With 1/2 a steer, 1/4 pig, 15 chickens, 15lbs strawberries and other assorted stuff in my freezer, I couldn’t fit much more in. Luckily for us, my oven has a dehydrating feature. Also luckily, Hub had some screen material handy so he made me screens that were perfect for the job.
I didn’t want to blanch the berries so I did some internet searching and found that it is safe to drench the berries in lemon juice and then load the tray and dry them. Worked wonderfully. I was able to fit about 6 quarts of fresh blueberries-worth into 2 quart jars once they were dehydrated. Now they are ready for homemade granola, oatmeal, cookies and breads or I can rehydrate them and make pies and muffins and more!
Hmmmmm…canning and dehydrating…I have a lot to add to my list of future projects! Question–What brand dehydrator do you recommend, and about how much do they run?
I do try to freeze small batches of whatever we may have leftover. I also do this with produce I pick up on clearance, etc. that is not bad yet but not the freshest of the fresh. I will chop up one lb. of carrots that I find on clearance at the health food store (if we already have carrots to eat) and use those carrots in a soup.
@Erin–The Humbled Homemaker, I use the Excalibur, which is the best one I know of. I believe I paid about $160 for the large model, but a reconditioned one (it still came with a warranty). It’s pricey, but I love mine and use it all year long, especially in the summer.
Very neat! So, if I add the dehydrated beans to a dish, like soup, would they be really tough and hard to eat? I’ve never tried a dehydrated green bean. Thanks!!
Hi – I don’t know why I took so long to take a serious look at this website – but now I am subscribed to it. I love the thought of preserving food. I borrowed a friends dehydrator (the round type) this past weekend and made sun-dried tomatoes, apple slices and blueberry fruit leather. I, myself, have been making homemade yogurt for quite some time with a modified crock-pot method but would love to get a rectangle-shaped dehydrator I can take the trays out of to incubate yogurt in mason jars. I am secretly hoping for something simular to what you have shown in your picture, but my thrifty side of me says I should just take a dremel to a $35 round one for my yogurt 🙂 Thanks for sharing 🙂
Ok, I’m really getting into dehydrating lately, but I am terrified to put stuff on my pantry shelf – I’m convinced I haven’t dried long enough and will end up with moldy food. Any tips to get me past this fear? I have a huge batch of banana chips and pineapple in my dehydrator right now, but they will go in jars in my fridge with oxygen absorbers because I’m so paranoid! I’d love to get over my fear though – with $3 pineapples right now, I could really stock up on healthy snacks for the coming year…
Don’t laugh at me, but I don’t know how to REhydrate these once I’m ready to use! My freezer could definitely use a huge break from summer produce. We freeze peppers off of about 200 pepper plants, corn, zucchini, squash, green peas, and my husband just put about 100lbs of venison in there too. I use my dehydrator for fruit but never for something that had be be rehydrated.