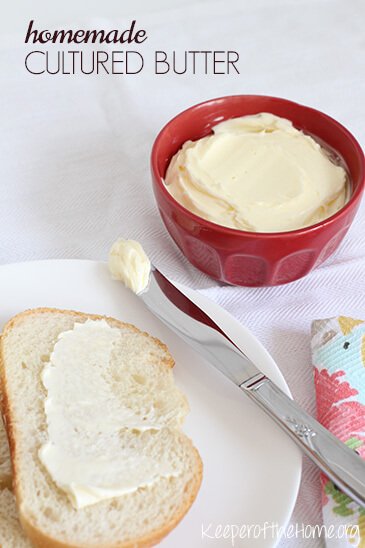
Make It Yourself: Homemade Cultured Butter
Written by Courtney, Contributing Writer
After decades under scrutiny, butter has finally making its rightful comeback in the kitchen. Traditional cooks knew all along that butter was nourishing and healthy, but only recently has the modern housewife rediscovered this culinary staple.
For decades, butter had a bad reputation, partially due to (un)scientific health claims and partly to that fact that it was lumped together with industrial butter sourced from feedlot cattle.
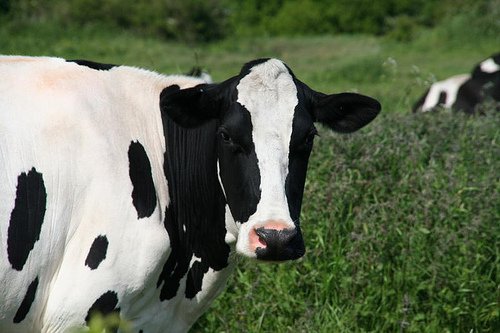
Deep golden yellow butter made from the cream of grass-fed cows free of hormones and antibiotics, pasteurized at lower temperatures or (preferably) not at all, is quite different that the pale sticks dressed up with natural flavorings in the big chain grocery stores. This is an important distinction to make. Let’s first take a brief look at some of the benefits of real butter in comparison to conventional butter before I share some tips for making your own at home.
Benefits of Pastured Butter
Green grass and exposure to sunlight, pared with fresh air and clean water, contribute to a higher vitamin and mineral content in grass-fed (pastured) butter, as well as a more ideal composition of healthy saturated fats. Pastured butter is high in omega-3s and conjugated linoleic acid (CLA). The fat composition of grass-fed milk creates a softer and more spreadable butter than the conventional kind.
Conventional butter contains high amounts of omega-6 fatty acids due to the confinement diet made up mostly of (genetically-modified) corn and soy. Feedlot cattle are given hormones to increase their milk production beyond what they are naturally and safely able to produce. This unhealthy strain on their bodies combined with cramped and dirty living space and the unnatural diet creates a need for antibiotics, without which, they would surely become sick.
Considering the Cost
The differences between pastured and conventional butter are enough to consider them two completely different foods, in my opinion. Good quality pastured butter is expensive, though. With a family of eight, we go through a lot of butter, and purchasing pastured butter would be difficult to work into the budget.
Fortunately, making our own butter is more cost effective and oh, so easy! For about $8 worth of cream, I can make about two pounds of butter and one quart of buttermilk.
Other benefits of making your own butter include a fresher product, knowing the source of the cream, making sure no extra ingredients are added, and being able to add our own real salt, herbs, or honey when desired.
Making Your Own
There are several ways to make butter. It can be as simple as shaking cream in a mason jar (my old method) or mixing or blending in a stand mixer, blender, or food processor. I’m going to walk you through my method for making butter in a stand mixer.
I have heard that butter doesn’t always “break” (separate from the buttermilk and clump together) in a blender or food processor, so I prefer to stick with the tried and true mixer method, one that’s always worked for me without fail. You might prefer a different method. Anything that agitates the cream sufficiently gets the job done!
Gather your tools and ingredients. Butter is incredibly easy to make, but having a few tools on hand makes the job even easier. I gather a bowl and fine mesh strainer for straining buttermilk, a larger strainer with larger holes for rinsing the butter, a jar for buttermilk, and a jar for the butter. I also keep some butter on a serving dish to be used first. (Note: You can make due with one strainer, but ideally, a fine mesh works best for straining the buttermilk and one with larger holes works best for rinsing the butter since it is less likely to pool up in the strainer. You can also use cheesecloth or a nut bag instead of a strainer if you prefer.)
You will end up with about half butter, half buttermilk, so plan your jars accordingly. You may also wish to add salt or spices to your butter.
Grab the kids, too! Butter making is a great task for children, so bring them into the kitchen and teach them this basic skill. Little ones also enjoy the mason jar method of shaking the cream into butter.

All you need to make butter is some quality cream. Find a good source of cream from healthy cows raised on pasture. For optimal nutrition and flavor, choose raw (ideal) or vat-pasteurized (second-best option) cream.
My family consumes more butter than we can make from the cream in our fresh milk, so I also purchase a local vat-pasteurized, non-homogenized cream from grass-fed Jersey’s raised without hormones or antibiotics.
Cultured Butter
Traditionally, cream (after being separated from the milk) was placed in a churn at room temperature for several days until enough cream was obtained to make a batch of butter. During this process, the naturally-occurring bacteria in milk fermented the cream. The milk sugar, lactose, is converted into lactic acid, resulting in that tart, full-bodied flavor. Citrate, another substance in milk, is converted into diacetyl, which creates that characteristic “buttery” flavor.
You can culture your cream by simply placing raw milk on the counter for 12-24 hours or you can add a starter culture (likely a strain of strep..lactis) to milk that has been pasteurized. I have only used the raw milk method, but I am going to try using a purchased starter culture when I make up a large batch of the last of fall butter this week. Cultures for Health sells starter cultures.
I like to make several smaller batches at a time to reduce the splattering and to more efficiently work the buttermilk out of the butter. I use one quart of cream at a time. This makes about one pound of butter. If I’m starting with a half gallon of cream, I’ll repeat the process a second time. If I start with one gallon of cream, I will go through this process four times total.
Pour the cream into the mixer with a whisk attachment and start off on a lower speed to prevent splattering. Increase the speed as the cream begins to thicken. In this first step, you’re essentially making whipping cream.
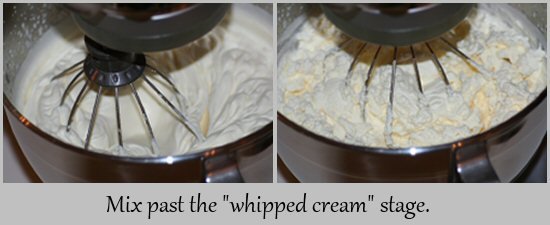
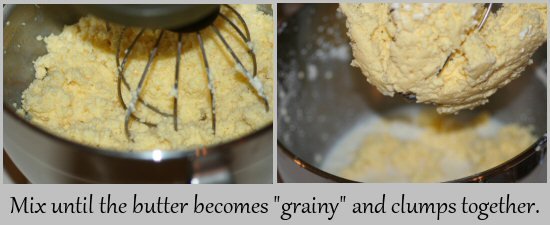
Once past the “whipping cream” stage, the cream will start to clump together. This happens because the protein casings surrounding the fat molecules is agitated and removed, causing the fat globules to stick together.
Keep a close eye during this stage because the buttermilk will separate quickly and start sloshing around in (and out of) the bowl.
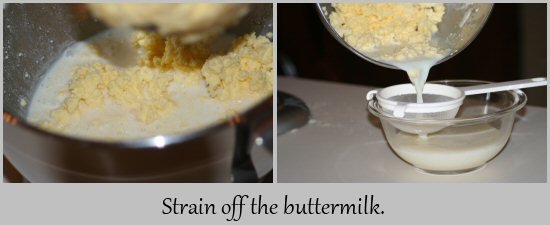
Pour the buttermilk into another container using the fine mesh strainer. This gets the bulk of the buttermilk out of the butter.
Be sure to use this precious buttermilk and not let it go to waste. It tastes good alone and is delicious in baked goods like pancakes or waffles. It is not the same as store-bought buttermilk that contains additives and fillers.
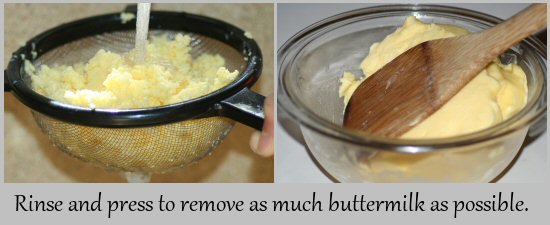
Rinse the clumps of butter and squeeze out the remaining buttermilk. The buttermilk will make the butter go rancid faster, so it is important to remove as much as possible.
This is a good time to add salt or herbs, if desired. You can even add things like cinnamon and honey if you wish to make a sweeter butter. (Adding salts and spices at this stage allows you to preserve the buttermilk during the previous stage.)
Just work your salt or spices into the butter as you press it with a wooden spoon to get as much of the buttermilk out as possible. This is where an old-fashioned wooden butter press would come in handy. My husband is planning on making one for me soon! You can get creative and “press” it with two different sized jars or other materials you have on hand.
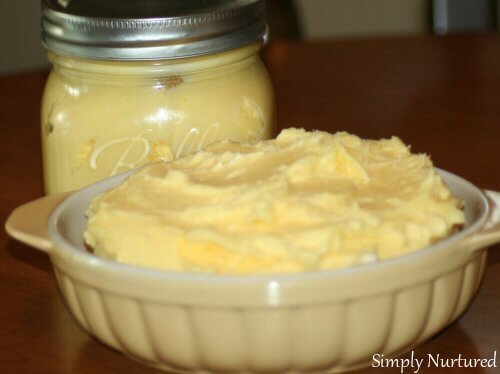
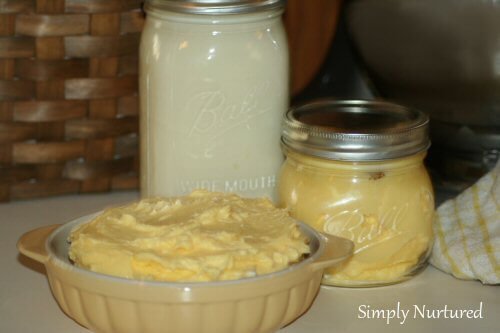
Form the butter into your preferred shape or just place it into a container for storage.
From one half gallon of cream, I end up with a quart of buttermilk and about two pounds of butter. One pound is put into a jar and one is placed in a little butter serving dish to be used up first.
Sweet Cream Butter
To make sweet cream butter, simply eliminate the culturing step. This creates a subtle, fresh flavor, still very flavorful and healthy.
The average store-bought sweet cream butter contains additives in the form of “natural flavorings” to achieve a more “buttery” flavor like that of cultured butter. Homemade sweet cream butter, will not achieve as deep a flavor as cultured butter, but it is still delicious in its own way.
Handling and Storing
If you are careful to remove all the buttermilk, your butter can be kept at room temperature for several days. I prefer to keep mine refrigerated, though.
For optimal flavor and nutrient retention, butter should be kept away from heat, light, and metal, since these things will oxidize and break down the fat faster. Butter also absorbs odors from its surroundings, so store in an air-tight container or cover butter that will not be used up right away.
Butter and buttermilk can both be stored in the freezer if you don’t plan to use them up within about a week. Butter is the most nutritious in the spring through fall months due to the taller and faster growing grass, so you might wish to stock up on cream during these times and freeze butter for later.

Love this! I can’t wait to try it. My kids will love making butter. Do you have any suggestions for finding large quantities of cream? I usually only see it in pint or (maybe) quart size.
I get half gallon and gallon quantities of cream in my area, from a local farm that now sells their products in local stores. If you have dairy farmers in your area, you might check with them. If not, I wonder if a co-op, natural food store, or even a larger chain grocery store might be able to order cream in larger quantities. I just ordered a case of cream (4.5 gallons total) from my local co-op, in which I will be making up a LARGE batch of fall butter to help stretch out over the winter months. (We will consume more than that before spring, but it will be nice to have the good fall butter at times.) You can also check the site http://www.realmilk.com/where.html to look for milk in your area. I hope that helps!
Two questions please.
When you say “rinse the clumps of butter and squeeze out…”, what are you rinsing with?
Also, we get raw milk, is using the top part of the “milk” the cream? That thicker part? We usually just shake the milk jug to mix it up. Thinking this might work.
Thanks. Looking forward to trying this. It is always intimidating trying something so foreign the first time.
You rinse the butter with water to help remove the buttermilk and then squeeze it to squeeze out buttermilk within it. If you’ve never made butter before, that might sound odd. It did to me at first! I thought the butter and water would mix and it would become watery throughout, but it doesn’t at all. The water doesn’t penetrate the butter. It just beads up on the outside. 🙂
Yes, that thicker, more opaque top layer is the cream. It’s supposed to take about 12 hours to separate from the milk, from what I understand, so the longer it’s left undisturbed, the better success you’ll have at extracting cream only. You will get a better butter to buttermilk ratio with a higher fat cream content/less milk. I never take all of it, as it is wonderfully delicious shaken up and mixed into the milk, but if I have an abundance of cream (well over 2 cups out of a half gallon jar), I will use some for butter, whipping cream, or just straight in recipes or coffee/tea.
I have some questions about making homemade butter….Do I have to use cream or can I use milk? Also I have no access to raw dairy products. Can I use Organic milk or cream purchased at the store? I know it is not ideal and it’s ultra-pasteurized…..Any ideas?? 😉
You can use milk, but you will get a very small amount of butter at the end, as it’s the fattier content that forms into butter. With cream, about half (maybe a little less than half) of the cream turns into butter, and I think cream is somewhere around 1/5 of total milk content (in fresh milk anyway), maybe less in organic store-bought whole milk, so you’re end result would be very small and probably not worth it. You can use ultra-pasteurized, and in fact, if you culture it first, you will gain back some of the benefits lost during pasteurization. 🙂
Thanks so much for posting this, can not wait to try it. I do have a question, during the rinse stage what are u using to rinse the butter?
Rinse with water. It won’t combine with the butter. It will just bead up on the outside. This gets more of the buttermilk off of/out of the butter to prevent it from going rancid faster.
thanks for sharing. i will have to try it cultured! and just want to add that using a blender is way cleaner & easier than the kitchen aid!!! it works faster too!
It is faster and maybe easier, too. I prefer the blender for several reasons. Mainly because I’ve heard that people sometimes have problems getting the cream to separate into butter using a blender. Also, I often make up a batch of whipped cream before making butter, so it works well to not dirty two appliances. (I’m not sure if you can whip up cream in a blender, but maybe you can.) And I like to have the kids alongside helping a lot of the time, and a blender is just so loud. They also like to watch it mix! 🙂 But good point. Some will definitely prefer a blender (or food processor).
I always make my own butter with the cream off our raw milk. I don’t know what the deal is with my stand mixer, but I’ve never gotten my cream to turn to butter in it. I always have to do it the hard way – in a jar! It’s still worth it!
I usually hear that as being a problem with the blender or food processor method, but it’s good to know it can happen in the mixer, too. It might also depend on how long the cream was allowed to separate from the milk.
We used the jar method for years. Do you use a marble or just shake alone? I have memories of reading aloud in the living room while a jar of butter in the process was passed around when little arms tired of shaking. 🙂
What do you do with the milk after the cream has been skimmed? I hate to throw it out.
Yeah, don’t throw it out. 🙂 If it’s cultured first, it can be used for baking in recipes that call for buttermilk. You can also drink it straight, Sweet cream buttermilk tastes a lot like plain milk but slightly different. Cultured buttermilk is more tangy. You can freeze it, too.
Wonderful! I’ll be sharing this on my fb page!
This post is awesome! I will definitely have to try it out at home. I remember doing the clothespin in a jar method when I was in Campfire Kids back in the day.
Does it matter what you culture it with? I have kefir starter, would that work? I am so intrigued! Thanks for sharing!
I saw on Cultures for health that yes, you can culture it with Kefir grains.
i am bookmarking this for when i sign up for raw milk in our area – it is on the list of something i want to eventually incorporate into our diet.
my recent post: I AM the Lord your Provider
We use raw goat milk for its compatibility with the human system. The fat molecules in it are smaller, so the fat doesn’t separate into cream like it does from a cow:( Any advice on how to make my own goat milk butter? We used to have organic goat milk butter available at a local health food market, but they no longer carry it; even when it was available to purchase, it was very expensive!
I know it’s been a long time since you posted this, Ashley, but in case you haven’t found anything on making goat butter, try this article: http://www.motherearthnews.com/real-food/how-to-make-goat-milk-butter-zmaz78jazbur.aspx
🙂
I have made my own butter for many years. To get the liquid out of the butter to prevent spoilage, I put it in a bowl and run cold water into it. Then I take a wooden spoon or paddle and just keep pressing the butter against the sides of the bowl, changing the water when it becomes a bit cloudy. When you can move the butter around the bowl in the milk without it becoming cloudy, the butter is done. The reason I use really cold water is because it makes the butter colder and it holds together better. The liquid that you strain out when you first take it out of the mixer is buttermilk, but not cultured buttermilk that you buy in a store. You can use it in baking or drink it. Homemade butter is so good, you have got to try it!
Yes, that method of rinsing the buttermilk would work well, too. There are a lot of different ways to squeeze out that buttermilk. And yes, cold water is what you should use. I should have mentioned that! Thank you for mentioning that.
If you culture the cream first, you will end up with cultured buttermilk, but if you don’t culture it, you would end up with buttermilk that is simply the liquid part of the cream after separating from the butter, and in this case, it would be sweet cream butter, not cultured butter.
My Mom always made our butter when we were growing up. There’s nothing like it! I think I am going to try my hand at this. I did make some by mistake once while whipping cream for Thanksgiving dessert………LOL. My father in law loved it. Thanks for the clear instructions. I think my hubby will be happy, too.
Oh yes, nothing like homemade butter! And a lot of people make it on accident by over-whipping their cream! How did your mom make it? I’m always intrigued with how generations before us did things.
My state doesn’t allow sales of raw milk for human consumption. So, I hit Craigslist and found someone who sells if for animal use. He said they drink it and also make butter & buttermilk. Crazy state :S
I bought a gallon of raw milk tonight and have it on the counter so the cream will rise overnight. I wanted to ask you about the amount of salt you would add to each batch.
Can’t wait to do this tomorrow! Great blog!
Yeah, crazy laws. 🙂 The cream will rise to the top in the refrigerator, too. I keep my milk refrigerated and then scoop off some of the cream when it’s risen, then I set the cream (only) on the counter to culture overnight. This way the milk stays cold. I just wanted to clarify.
I never measure the salt. Sometimes I don’t even add any, but I typically use about 1/4-1/2 tsp. per batch (pound). That’s just a rough guess. It’s a matter of taste. And if you plan to use a particular batch for baking, unsalted might be preferable.
Ok, I left the raw milk in the frig and ladeled off the cream and left it covered on the counter overnight. I put it in the mixer and mixed, and mixed and mixed. It just seemed to look like margarine in a tub even after I poured off the buttermilk.
I put the butter back in the mixer bowl and put it back in the frig for about 20 minutes. Same thing. It never seemed to clump into a ball in the whisk attachment.
I did use cold water as I kneaded with my wooden spoon and poured off the discolored milk and added more water until the water was clear. The butter looked light in color and was the consistency of tub margarine. I added no salt.
Any ideas about what went wrong? It tastes good. I put it into a plastic freezer jar and put it in the freezer. I would really appreciate feedback. I should have 3 more batches as the cream rises.
We have our own jersey cow, and so we make all our own butter, yogurt, kefir, cottage cheese, and at times other cheese. I have done our own whipped topping, but I have not discovered what I need to do so that it keeps its holding power, in other words it will get watery when it sets for awhile. I make our butter in a blender and have found that to work quite well, although a stand mixer would be quieter. I also rinse it in cold water to get out all the milk.
I haven’t made butter in such a long time. I think my daughter would love to try this one! She’s only two, but we love working in the kitchen together, and I love that she’s learning about real food from the start!
Could you direct me to any sources that explain the difference between healthy and unhealthy saturated fats?
We just made some this past week. The kids enjoyed the process and we had some delicious tasting butter.
From what I’ve read you take the cream off the top of your raw milk to make your cultured butter. Aren’t there dangers associated with consuming raw milk, especially for pregnant women and children? Don’t you worry about that? Could I use store bought cream to make butter? Would I be able to make cultured butter with it? Thanks.
My husband’s grandparents always would churn their own butter. Making our own butter is something I’ve been meaning to do. I’m able to get raw milk from a local dairy farmer so will have to give this a try. Thanks for the details!
I have always used my blender. But, I am not getting near the quantity of butter that you say you are getting from your mixer. One quart is yielding only about 1/2-3/4 cup of butter. Hmm??? I wonder if a mixer would yield more? I’ll have to try it. Also will try culturing longer or adding a culture. I do know,however, that it does not work well if my cream is cold. I always let it sit until at least room temperature before beginning. Otherwise I might whirl away and not get anything but hot cream. 🙂 FYI: My family didn’t like my butter until I finally learned to really work all the buttermilk out of it. I’m not finished until my water runs clear. (usually about 4-5 rinses with ice water).
I would love to try this, I am alittle confused are you using a gallon of Cream like Heavy cream or are you using whole pasturized milk?
Do you have any recipes for making cottage cheese?
Yes, try this one- https://keeperofthehome.org/2012/10/make-it-yourself-homemade-ricotta-cheese-tutorial.html. It’s for ricotta, but it’s basically the same thing. 🙂
I was raised on a small farm in Wisconsin and remember making butter in a gallon jar. The fresh butter was wonderful, how I miss that flavor! If ever you want to sell some please let me know. My mother used to sell the butter that she made to many Chicago people. They loved it……
Ok, so I really really want to do this, I think I only have a few questions, lol. So to start am I getting raw ‘milk’ or raw ‘cream’? And once I have it, the milk, I leave it in the fridge overnight to let the cream rise? Then take the cream and leave it on the counter for a while??. I think I understand the rest of the process! Thank you!!!
I beg to differ, Conventionally raised cows do not necessarily live in dirty barns, in fact most large dairies are cleaner and more comfortable for the cows than smaller dairies. Also, conventionally raised cows are not allowed to have any antibiotics in their systems if their milk is to be sold period ! Get caught doing that and you are in big trouble! Also just because milk is from a conventional dairy does not mean it automatically has synthetic bovine growth hormone in it. Farmers get premiums for not using it. I do agree raw milk is better, but check your source, small farms can be pretty yucky. – dairy farmer in New York
Hint for separating cream in raw milk: Pour the whole raw milk into a sterilized “sun tea” jar – a glass jar with a spigot at the bottom. Let stand for 12 hours in the fridge, then use the spigot to drain the milk into another container, stopping when you get down to just the lovely thick cream in the jar. 🙂
I received some cream from a friend who raises cows. I haven’t made my own butter before but I’m trying it now with my hand held mixer…..it’s not setting up like it should. I took the cream out of the fridge and poured it into a bowl and started mixing…..it’s whipping, but not creaming up into butter….I must be a complete moron because everyone says how easy it is and it’s not working for me so obviously I’m missing something pretty simple. Any advice? 🙂
When using fresh cream, make sure you let the milk settle long enough so the cream separates from the milk as much as possible. You might try bringing the cream to room temperature before mixing. When making whipping cream, cold cream fluffs up best, but with butter, it turns over best when starting out warm. I hope this helps.
I do make my own butter, and I started out by using my immersion blender! It actually works fine, but I have asked Santa for a butter churn this year. I do both sweet and cultured, but much prefer the cultured butter.