• Menu
  • Skip to left header navigation
  • Skip to right header navigation
  • Skip to primary navigation
  • Skip to secondary navigation
  • Skip to main content
  • Skip to primary sidebar

Keeper of the Home retina logo

Naturally inspired living for homemakers

  • About
  • Start Here
  • Blog
  • Resources
  • Contact
  • Search
  • About
  • Start Here
  • Blog
  • Resources
  • Contact
  • Search
  • Homemaking
  • Family
  • Natural Living
  • Homemade & DIY
  • Natural Remedies
  • Real Food
  • Recipes
  • Join Our Community
  • Resources
  • Disclosure
  • Sitemap
  • Homemaking
  • Family
  • Natural Living
  • Homemade & DIY
  • Natural Remedies
  • Real Food
  • Recipes
You are here: Home » Blog » Real Food » Recipes » Gardening with Herbs 101: Harvesting Your Herbs
Gardening with Herbs 101: Harvesting Your Herbs
freshly harvested bloodroot

Gardening with Herbs 101: Harvesting Your Herbs

September 8, 2011     Keeper of the Home    5 Comments

Written by Meg Dickey, Contributing Writer

Our weather may not be showing signs of Autumn, but our plants and gardens are certainly indicating it is time for harvesting!

If you have been consistently using your herbs throughout the summer, you may not feel you have many to preserve for the winter season (my catnip has been well-used this year, and I won’t be saving hardly any!). However, you certainly don’t want to wait until the first freeze to start harvesting your herbs!

fal 08 frosted basel
frost on a basil plant

You can begin harvesting your herbs for daily use when the plant has enough foliage to ensure continued growth. Successive harvests throughout the seasons encourage bushy plants with stronger leaf growth. Plan to cut your plants back at least once during the growing season.

Harvest in the morning, after the dew dries, but before the temperatures begin to climb. This is when the essential oils of the plant are at their strongest, and therefore their most effective.

Herbs produce their highest oil concentration and flavor after the flower buds appear, but before they open. Harvest at this time for most uses. Blooming plants such basil and oregano are still suitable for other uses, which we’ll talk about next time.

Harvest annual herbs until frost, making as many successive harvests as possible without damaging the plant. Don’t cut too near the ground, as this will retard future growth. At the end of the season, harvest the entire plant.

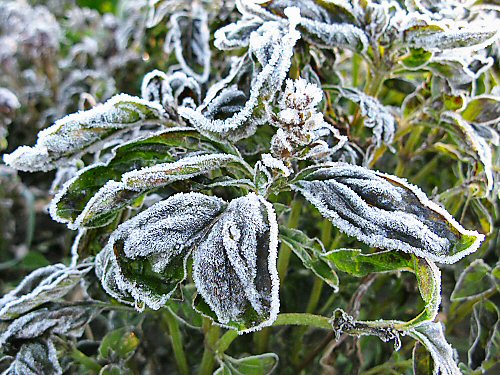
Harvest perennial herbs until about one month before the frost date. Late pruning encourages tender growth that will be killed off by the frost, and plants need the regrowth to see them trough the winter.

Gardening with Herbs 101: Harvesting Your Herbs

Harvest tarragon or lavender flowers in early summer, then cut the plants to half their height to encourage fall flowering.

fennel in bloom
fennel

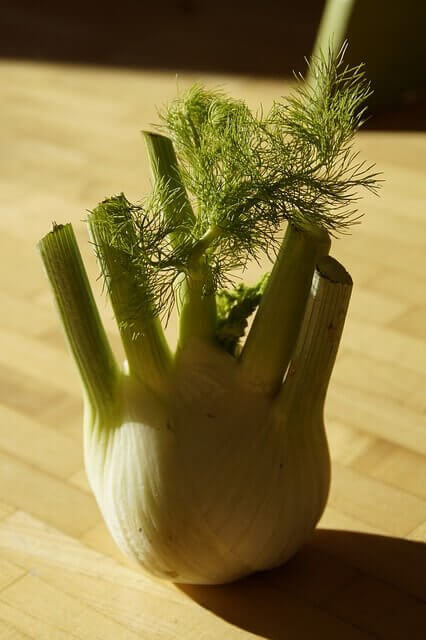
Harvest herb seeds (mustard, fennel) as the seed pods darken and dry, but before they burst. Secure a paper bag over the seed head to complete ripening, then cut the stem and hang the bag for further drying.

freshly harvested bloodroot

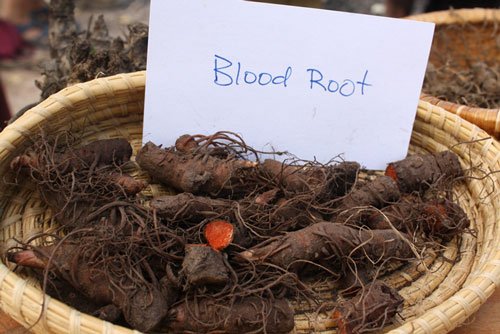
Harvest herb roots (bloodroot, ginseng, chicory, goldenseal, horseradish, Oregon grape) after the foliage fades.

Next time, we’ll talk about the different ways of preserving our harvest!

What herbs are you harvesting from your gardens this year?

Share this post:

Share on TwitterShare on FacebookShare on PinterestShare on LinkedInShare on Reddit

Category: Homemaking, Natural Living, Real Food, Recipes

Sign Up For Our Newsletter

Get our latest posts, right to your inbox.

[convertkit form="302779"]

{No spam, ever.}

You May Also Like

  • Gardening with Herbs 101: Preserving Your Herbs
    Gardening with Herbs 101: Preserving Your Herbs
  • Gardening with Herbs 101: Where to Begin 1
    Gardening with Herbs 101: Where to Begin
  • Gardening with Herbs 101: What to Grow 2
    Gardening with Herbs 101: What to Grow
  • Gardening in Less-than-Ideal Spaces
    Gardening in Less-than-Ideal Spaces
  • A Tale of Two Gardens
  • Getting Organized in the Garden: Seed Starting and Planting Schedule
    Getting Organized in the Garden: Seed Starting and Planting Schedule
Previous Post: «Embryo Adoption: A Unique Option to Give a Child Life Embryo Adoption: A Unique Option to Give a Child Life
Next Post: You Asked For It: Plan It- Don’t Panic! {A 6-Week Meal Planning Challenge} »

Reader Interactions

Comments

  1. Amy (One Day Closer)

    September 8, 2011 at 7:36 AM

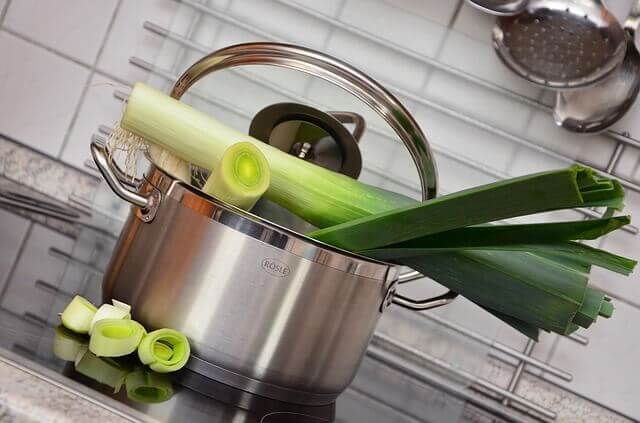
    I am harvesting basil, mint, rosemary, parsley, lemon-grass, thyme, chives, lemon balm, lavender and stevia.

    The basil will become pesto, and I’ll freeze it in little glass jars. The mint, lemon balm, and stevia will be dehydrated for loose leaf tea. The rosemary and mint will be moved indoors for winter. I plan on chopping the parsley and freezing it in ice cube trays to add to soups this winter.

    I don’t know what to do with the lemon-grass, thyme, and lavender. I want to preserve the lemon grass (preferably frozen?) for soup. The thyme is for soup too, what is the best way to preserve that? And the lavender is all done blooming. I had cut it back as you advised, but only got 2 flower stalks off of it for fall.

    Reply
    • Meg @ Cracking An Egg

      September 8, 2011 at 8:07 AM

      @Amy (One Day Closer), We’ll be covering the “how to” for preservation next week, so make sure to come back and see my favorite methods. 🙂

      Reply
    • jeannie

      September 8, 2011 at 12:46 PM

      @Amy (One Day Closer), Hi Amy.. I like freezing pesto in ice cube trays to pop into sauce or minestrone… works great.

      Reply
  2. Ashleigh

    September 9, 2011 at 8:48 PM

    What do you mean by “enough foliage to ensure continued growth”?

    Reply
    • Stephanie @ Keeper of the Home

      September 11, 2011 at 9:26 PM

      @Ashleigh, I think she means that you aren’t stripping the plant of too many of its leaves. From what I have read before, when you harvest something like a herb (where you are taking leaves, not just fruit or vegetables) you need to leave at least 1/3 of the leaves so that the plant can continue to be healthy and keep growing.

      Reply

Leave a Reply Cancel reply

You have to agree to the comment policy.
Recipe Rating


Primary Sidebar

Sign Up Now

Get our latest posts, right to your inbox.

[convertkit form="302779"]

{No spam, ever.}

Popular Posts

How to Make Your Own Natural Makeup #DIYFriday (with Video) 11

How to Make Your Own Natural Makeup (with Video)

How to Make Your Own Natural Makeup (with Video)
12 Simple Homemade Spice Mixes 9

12 Simple Homemade Spice Mixes

12 Simple Homemade Spice Mixes
Dry feet are no fun! When skin on your feet becomes dry, it often causes itchiness, cracking, and even bleeding. But, never fear, this luxurious lotion will keep your feet soft and supple all winter. The oils and butters in this DIY foot lotion are highly moisturizing and nourishing to the skin. It's designed for the feet, but can be used on dry, cracked elbows and knees.

DIY All-Natural Lotion to Cure Dry Feet

DIY All-Natural Lotion to Cure Dry Feet
10 Truths You Need to Hear When You Feel Like a Failure as a Mom 3

10 Truths You Need to Hear When You Feel Like a Failure as a Mom

10 Truths You Need to Hear When You Feel Like a Failure as a Mom
10 Questions for Expectant Moms to Ask BEFORE the Third Trimester 2

10 Questions for Expectant Moms to Ask BEFORE the Third Trimester

10 Questions for Expectant Moms to Ask BEFORE the Third Trimester
The Ultimate Guide to Homemade All-Natural Cleaning Recipes 10

The Ultimate Guide to Homemade All-Natural Cleaning Recipes

The Ultimate Guide to Homemade All-Natural Cleaning Recipes
  • Join Our Community
  • Resources
  • Disclosure
  • Sitemap

Site Footer

  • Facebook
  • Google+
  • Instagram
  • Pinterest
  • Twitter
  • YouTube

Copyright © 2021 Keeper of the Home · All Rights Reserved · Privacy · Sitemap · Powered by Spears Marketing