Making Homemade Yogurt
Today I made a batch of homemade yogurt, and as I am often asked how I do it, I thought I would post a simple tutorial on how to do it.
Homemade Yogurt
Ingredients
You will need:
- Minimum 1 L or quart of milk and up to about 4 L or 1 Gallon
- Yogurt starter just plain old, unflavored and unsweetened, real bacteria yogurt- about 1 Tbsp per L or quart of milk
- A large pot or a couple smaller ones
- Clean glass jars for storing the yogurt
- An oven with a light inside
Instructions
- First, pour the milk ( I usually make 2-4 L, or 1/2 to 1 gallon, at a time) into a large pot, and set it on medium heat. You want to bring the milk to a boil, but slowly, so that you don't burn it on the bottom of the pot (it's very easy to burn milk). Towards the end, watch it very closely, as once it hits the boiling point, the foam on the top will immediately start to rise, and if you don't quickly remove the pot from the element, it will boil over the top (all over the stove, all under the element, very difficult to clean). I know this well, because I do this about (half of the time)
- % of the time I make milk, because I so often forget about my milk while I am doing other things.
- Once the milk has just boiled, remove it from the heat and allow it to sit and cool off. Depending on how much milk you are doing, this can take up to a couple of hours. I have put my milk in the freezer to cool when rushed for time. You want it to cool down until it is just warm (so that you could comfortably put your finger in it). Honestly, I'm sure there's a specific temperature, but I never bother with thermometers. I just wing it, and it works, so why make it more difficult than it needs to be?
- Next, set aside several clean, glass jars (canning jars are perfect, but so are old mayonnaise or pickle jars). Get out your yogurt starter, and put about 1 large tablespoon per litre (or quart) or milk into one of the jars. Then add a bit of the warmed milk, and mix it until the yogurt is dissolved into the milk. Pour this mixture back into the pot and stir well. Now, you can use a ladle to fill up your jars with the milk mixture.
- Turn on your oven light (just the regular light that you use to peek in on your cookies while they're baking). Put the jars full of milk inside of the stove. I usually cover them with a piece of paper towel or a clean dishcloth. Leave them in the oven for 6-8 hours. I prefer to put mine in at night, before bed, as it is ready in the morning when I get up. Today I made mine at about lunchtime, and it was ready just after dinner.
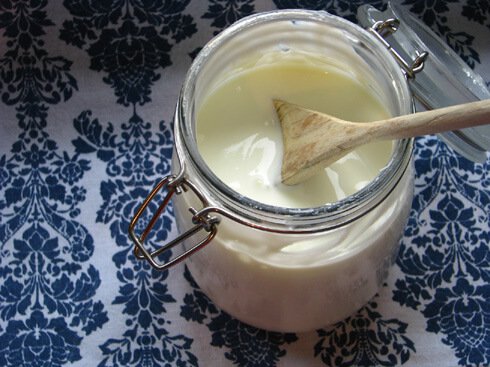
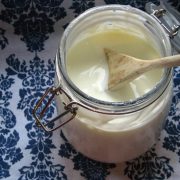
- That's it! Today's yogurt, ready to be put in the fridge to cool off and be eaten for breakfast tomorrow!


I know this entry is from a while ago, but I have a couple of questions for you.
1. Where do you use for your yogurt starter? I’ve read that you can just use store-bought yougurt with live cultures, or you can actually buy the cultures apart from the yougurt.
2. Do you keep your oven warm at all? The only other instructions I’ve read on making yogurt say that you must incubate your yogurt in a warm place. Honestly, this is the biggest turn-off for me. According to these instructions, you have to keep checking on the temperature so that your cultures don’t die.
3. Now that you’re avoiding cow’s dairy, have you tried making yogurt with other milks? I drink rice milk on a regular basis (mostly on my cereal), and I am considering trying that. Either that or I’d try soy milk. I’ve read that conceivably you can make yogurt from any milk.
Thanks for all your advice!
What went wrong?? I tried this recipe and followed it exactly, but I don’t think I ended up with yogurt. While the milk was heating up and starting to get foamy it started to look curdy and the temp was about 190 so I took it off the heat to cool. After mixing the starter and placing in the oven for 6 hours, what I have is a bunch of curds with a watery substance (whey?). I know homemade won’t be as thick as store bought yogurt, but this doesn’t seem right. Sooo, has this ever happened to you? And what does your yogurt usually look like consistency-wise? Any idea what went wrong?
Thanks,
Christy
Did you know you can make yogurt in a crock pot? It actually works!
http://crockpot365.blogspot.com/2008/10/you-can-make-yogurt-in-your-crockpot.html
An easy way to cut yourself some slack so you don’t have to watch your milk and keep it from burning is to put the milk right into the jars and the jars in a pot of water. You cannot burn it! Put a washcloth underneath so the jars don’t knock around and break in case you do forget and it gets boiling away. I hope you don’t mind if I leave the link to my yogurt-making post here: http://www.kitchenstewardship.com/2009/04/13/monday-mission-homemade-yogurt-the-easy-way/ If people aren’t as comfortable “winging it” I have the temps and such that they’ll need! 🙂
Katie
Hi
I just wanted to tellyou that I tried your method and added the towell in the pan idea from katie@kitchen stewardship then put jars in oven with light several hours! I love having my own yogurt it is so empowering! Thankyou, your tutorial made me want to try this.
Jean
Just in case anyone is curious the upper temp for boiling is 180 any more than that and you scald your milk and the perfect cool down temp that Steph mentions she doesnt know is around 110. Just FYI!
If the milk goes over 110’f – you just pasteurized it.
i tried your recipe, and ended up with more like curds and whey. i wonder if my milk was too old. i used a partial gallon that was a week soured and another partial that was 2wks gone about… mixed them together. does that sound like it might’ve been the problem? there was nothing i read here about the age of the soured milk. thnk you!
I would also check your temperature. If the temperature while the yogurt is culturing is too high, it can make the milk separate like that, which has happened to me before.
Rather than use an oven; from your dehydrating tomatos page I see you have the same dehydrator I do (Excalibur) which is excellent for this….as long as you have >4 tray model.
Andy
Although you posted this a while back, I have bookmarked it and shared with a few people. Yogurt with live culture is very important in keeping a healthy digestive tract. Once done, and served up, so much can be done with natural flavorings such as berries. I used to eat mine with a little honey drizzled on it as well.
Just tried your recipe for yogurt. I really liked how it was thicker then other recipes I have tried. When using store yogurt as starter so you get enough live culture by using 2 Tbs? So new to this way of eating not to mention i just had to go on antbiotic for a upper respiratory infection I couldn’t kick myself. I wanna make sure I am getting plenty