Simply Sprouted Grains
There are so many different kinds of gadgets out there for sprouting: special sprouting jars and mesh lids and home sprouting devices…
I’ve been sprouting grains and legumes for a couple of years now and I have never purchased a single piece of special equipment in order to do it successfully!
Here’s how I do it:
- Soak grains/legumes/seeds overnight in a bowlful of water. Make sure that the water level is much higher than the grains or whatever you are sprouting. They will absorb quite a bit of water! I usually put in about twice as much or more water than the amount of sprouting material that I add.
- In the morning, I pour everything into a plain old kitchen strainer/colander. I rinse the grains very, very well this first time, as some things that you will sprout will emit a mucilage (somewhat of a sticky, mucus-like type of coating) after being soaked. You want to make sure that you rinse this off completely, or else your grains may end up going bad rather than sprouting.
- After rinsing, I place the strainer over a large bowl (to catch the drips), cover it loosely with a clean kitchen towel, and set it off to the side on a kitchen counter.
- Every evening and every morning I rinse the grains very well, shaking them around a bit to make sure that they are all thoroughly rinsed and that there are no dry areas. The grains need to stay damp at all times. In the middle of the day, I often take a peek to make sure that they are not drying out, and if they are I will do just a quick rinse/spray to keep them moist. In the summer, when it’s warmer out, I often need to do this third rinse.
- Depending on the temperature of your home, it will take anywhere from 8 or 12 hours, and up to 3-4 days for the grains to sufficiently sprout. You want to make sure that they all have cute little tails, perhaps a couple of millimeters long (hmmm… in imperial this might be an 1/8 of an inch?).
Here are a few pictures of my sprouting process:
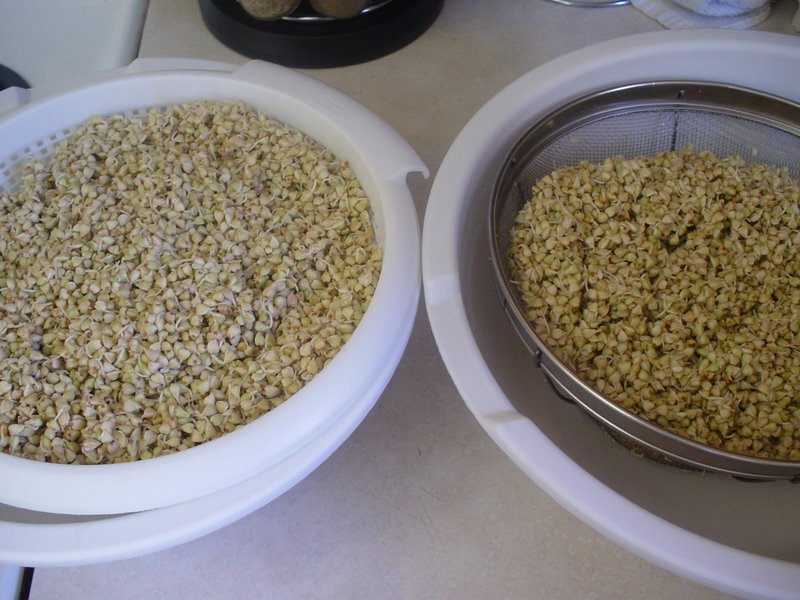
These ones are buckwheat.

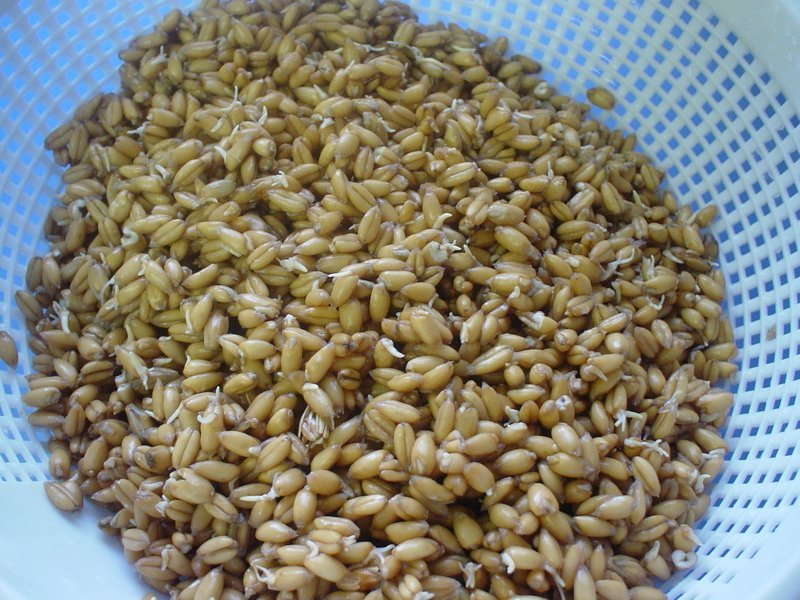
These are spelt berries.
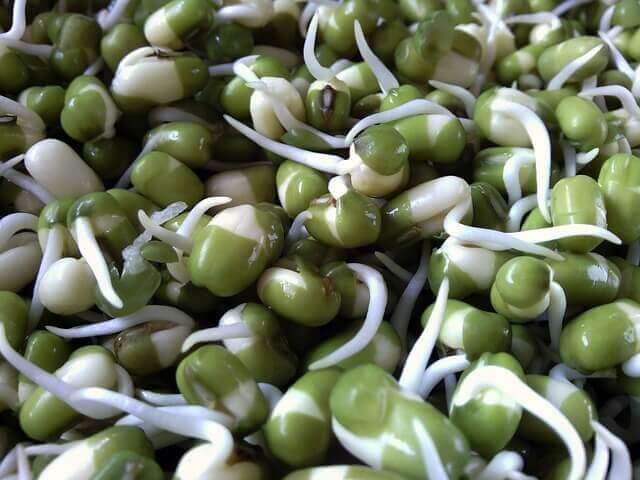
I’ve also sprouted chickpeas and lentils, using the same process. You could also do the same for seeds, if you want to make sprouts for sandwiches, salads, etc. but you would need to have a strainer with very small holes.
Another option would be to find some sort of plastic or wire mesh, cut it into a circle the size of a canning jar, and using a canning ring to hold it in place. You can then rinse them by pouring water right into the jar, swishing it around, and then draining the water. Set the jar on a bit of an angle, to allow the sprouts some breathing room. Once they have stated to sprout, you can spread them out on dinner plates, as my mother-in-law does, and put them on a windowsill or in her case, on the floor in front of her sliding glass doors, to catch the sunlight for added chlorophyll.
And what do I use these for? For grains, I can either blend them up into a batter or dough in my blender or food processor. I use the buckwheat to make a raw, sprouted granola in the dehydrator. I also dehydrate sprouted spelt grains, so that once they are dry I can make flour that doesn’t need to be soaked before baking (I used this for my tortillas last week and they were awesome!).
The chickpeas I use to make raw hummus or dehydrated falafels- so yummy! The lentils I used in another raw dish that was dehydrated. We really disliked the particular recipe I used them for, but I’m sure there are many great ways to use sprouted lentils!
And sprouted seeds are the perfect addition to any sandwich, especially my favorite- stuffed inside pita bread! They are also a great addition to a salad, just sprinkled on top before serving. We also put them in our tacos sometimes, for an extra nutrition boost. I’ve even blended them up in smoothies or in a fruit leather mix (shhh… don’t tell my family. They couldn’t even tell!)
So who says you need a bunch of fancy equipment to make incredibly nutritious sprouted foods in your own kitchen? A bowl, a strainer, a cloth, and lots of water- works for me!


Thank you for this helpful information. I’ve just recently uncovered the information on soaking and sproating grains. What about oatmeal? We have oatmeal for breakfast most mornings? Should I soak that? Do I drain it in the morning and add new water?
Thanks for your helpful tips!
I love your blog!
Hi Linds! Yup, oatmeal should be soaked, and no, it doesn’t need to be drained in the morning. Perhaps I’ll write a post in the next week or so with more detailed directions on how to soak oats. Thanks for the question!
Great! Thanks so much for clarifying!
Thanks for sharing this great information. I have been reading up on sprouting grains and want to give it a try!
I’ve look at buying a book called:
Sproutman’s Kitchen Garden Cookbook
Have you heard of that one?
Hope you are well.
Stacy
Nope, I’ve never heard of that book, Stacy. Let me know if you like it!
I am super impressed! I do good just to cook some nights!
What do you think about alfalfa sprouts. They are so popular, yet I have read (I think in Nourishing Traditions?) that alfalfa sprouts are not good for you, only the mature plant is. Is that the info that you have also?
Do you use a sprout cookbook? I love sprouts, but I have not ventured into using them other than on sandwiches or salads? Or do you just experiment?
Candace, I used to eat alfalfa sprouts, but have hestitated to do so since reading about it in NT. That was the first I ever heard that they were bad, but the book is right on in so many other regards, that I am leaning towards trusting what it says about the alfalfa.
I have a couple of raw cookbooks, which give many great ideas of what to do with sprouts. I linked to them in my recent post:
https://keeperofthehome.org/2008/03/resources-for-t.html
And sometimes I just experiment, but only now that I’ve gotten a few ideas from the books.
Alfalfa sprouts are perfectly safe, and in fact one of the best food sources for a compound known to lower bad cholesterol.
http://www.living-foods.com/articles/sproutbenefits.html
I just recently found your blog and have enjoyed reading many of your posts. Thanks for the time you put into this. It is an encouragement me to and a great learning tool. I have read many of the books you suggest and have been learning and taking baby steps to make changes for our family. I don’t have many others in my area who have the same interests although I don’t waste an opportunities to educate if they arise. I have gained valuable information from your site and will return. I tried to enter the give away, but had some technical difficulties. I was trying to remove my last name, but my computer kept freezing up and I entered it several times. Sorry about that. Thanks again!
Thank you for the encouragment, Jodi! Welcome! 🙂
And don’t worry about the giveaway. I deleted the extra comments, so it’s all good!
Want an easy way to get sprouted 100% whole grains in your diet without the fuss of sprouting them yourself? The first certified organic sprouted flour mill, one of the few in the country to achieve the rating of Superior from the American Institute of Baking is now producing the most amazing, nutritious flours. Shiloh Farms sells both sprouted spelt and sprouted wheat flours that can be substituted one for one for all-purpose flour. This flour digests as a veggie!
What a great site! I just read The Maker’s Diet and learned for the first time about sprouting grains so I’ve been desperately seeking out HOW to do it. Your explanation is terrific! I’m excited to give it try! Thanks for all the info 🙂
Just when I was about to give up on sprouting because of the cost, you’ve inspired me to give it a try!
thanks so much. i’ve gone over many sites re: sprouting grains, but yours seems by far the most clear presentation, though others have also given great help. i am grateful for the step by step. i’m one who needs a picture!!! here goes…i’ll give it another try.
okay, well i finally gave it another try. it worked well, except that when i dehydrated the grains, i guess i made the layers too thick and they actually sprouted a little more and took a long time to dry. i did put them into a jar and refrigerated them. can you tell me if i might have destroyed them by dehydrating so long? is it necessary to retain the little dry tails, as some of them fell off in the process? i’m anxious to go on to the next step and actually bake bread!
Bonnie, as long as the dehydrating temperature isn’t really high (like above 130 degrees, which most dehydrators don’t even go up to), it’s fine that they were in there for a long time. And don’t worry about some of the tails falling off. The grains still have increased nutrients due to being sprouted. (But still keep the tails if you can). Hope your bread turns out well!
Hello Steph! I’ve been wanting to try this for a long time. I have a few buckets of whole grains sitting in my kitchen. Thanks for sharing these simple tips! I have a question though… do you cooking the beans after you’ve sprouted them? I didn’t see that in your post unless I totally miss it! Can you email your reply to me? I’m not good at remembering to go back and check for responses to my comments ;oP Thanks!!