Raising healthy eaters- Making your own baby food
One of the best things about making your own is not only that it makes the most economical sense, but that it makes even organic baby food very, very reasonably priced. Organic food is even more important when it comes to feeding babies, simply because their bodies are so much smaller and more delicate than ours. The amount of pesticides and other sprays and chemicals that are on those apples you’re making into applesauce weigh far more heavily on their immature systems than on ours. And because they are at such a crucial stage of development, it is so important that we make sure that their growth can continue, unhampered by unwanted chemicals and toxic substances.
And the price? Allow me a quick comparison. Around here, a jar of organic baby food (the smaller size jars) goes for around $.80 a piece. I believe one of the stores has come out with a new line recently that might go as cheap as $.60, so let’s go with that figure. I buy a bag of organic carrots for $2.50. Using half of that bag (or even less), so $1.25 worth, I can make two ice cube trays full of food- which equals 24 meals. 24 meals of commercial baby food equals about 12 jars (as each jar holds about two cubes worth of food). So, 12 jars x $.60= $7.20.
$7.20 compared to $1.25? And the peace of mind of knowing exactly what went into my precious baby’s food? I’ll take it, for a little bit of extra work!
When I make baby food, I usually try to make several things all at once. I will be steaming one veggie while I chop up another, then steaming the next while I blend up and pour the first into trays. It takes very little time, really. I can easily make a months worth of food in about an hour.
To make it more convenient, something that I often do is just take leftovers of a baby-friendly food (the remnants of a baked squash, for example), and quickly blend them up and pop it into trays while I am cleaning up dinner. Or when I am making chicken broth, I set aside a bowl of chicken that I am already working with, a little bit of the broth, and just blend it while my broth continues to simmer or cool or whatever stage I am at.
Here are some pictures of some pureed chicken I made this weekend:
A bowlful of cooked chicken, after I took the chicken out of the crock pot. If I was making veggies, I would chop the veggies into large chunks and lightly steam them until soft enough to blend easily. If I was making fruit, I would lightly cook the ones with pectin (apples, pears, etc.) and others (like peaches, papaya, etc.) just cut into blender sized chunks.
I took a cup or so of chicken and added it to the blender with a little bit of broth, and blended it on low until well pureed, adding a little more water as need. For veggies, Nourishing Traditions says to add a little bit of butter (especially for root vegetables, such as carrots or turnips), although I would only do this with organic butter and it is definitely not necessary. For fruit, just add water. Regardless of what you are making, add only as much water as you truly need to get the food well blended, as too much water will result in a consistency that is too liquid, difficult for feeding, and may not appeal to your baby.
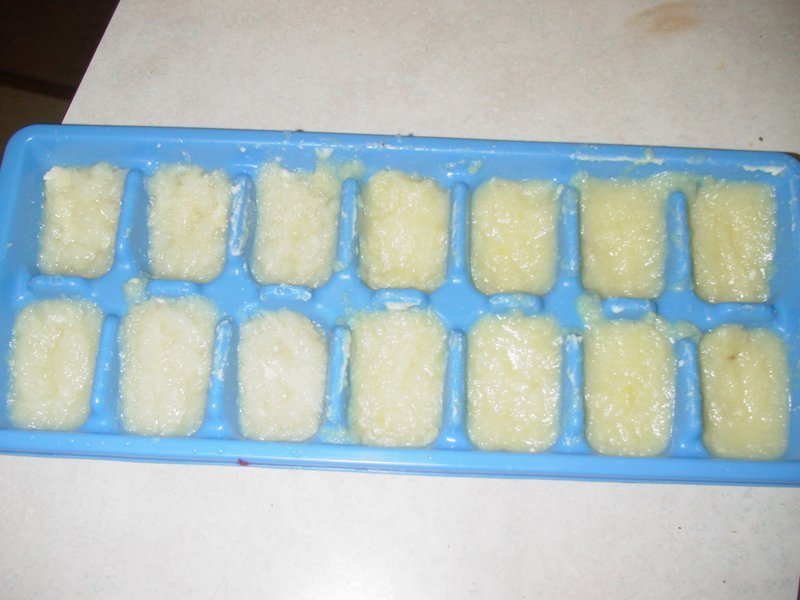
Next, I pour the pureed food into an clean ice cube tray (this picture is actually of some sweet potato I made last week). Freeze it, covered, for a few hours until the cubes are set enough that you can pop them out.
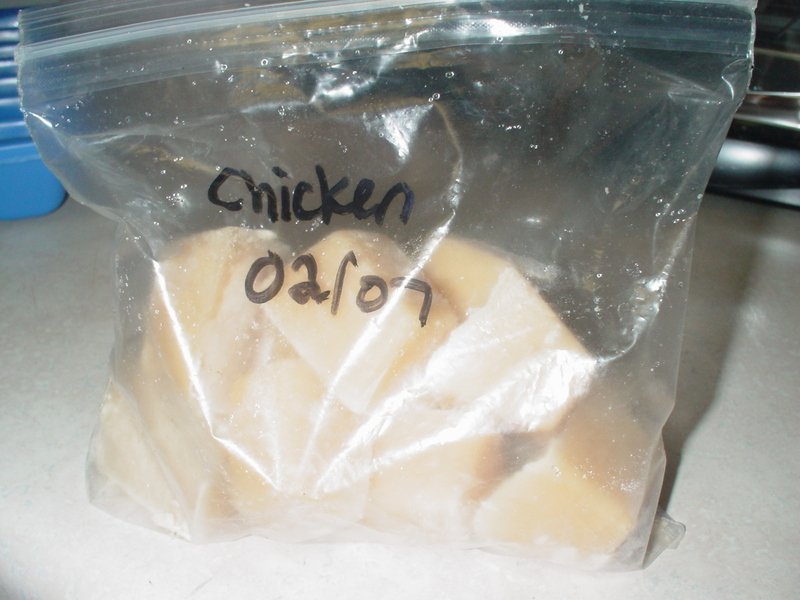
Put the cubes in a Ziploc bag, or Tupperware container, etc. and mark what they are (it’s so difficult to tell once they’re frozen) and the date that they were frozen. Baby food can last up to 3 months once frozen (I’ve also read 2 months- you could go more conservative if you prefer). I just try not to make too much at once, so that I can use it up before I need to start worrying about it. Since my baby only eats about a tablespoon for a meal right now (about half a cube), I’ve been making very small amounts- no more than 1 tray full at a time. Just increase how much you make as your baby begins to eat more.
And that’s it! Early in the day, take out what baby will be eating that day and put it in bowls in the fridge, to allow it to thaw by the time you need it.


This is a great tutorial!!! Thanks for sharing. I made all my own baby food with my DS (now 14 months), but I was hobbling along! I’ll remember some of these tips when our newest little one is ready to start “solids” (she’s due next month). 🙂
Thanks for the info. I’ve always been intimidated to make my own baby food, but it looks really easy!
With a dairy allergy, it is very important that I know EXACTLY what is in the food I’m giving the baby.
Thanks again!
Oh, I also got your email about the “Excellent” award. No problems on not passing it along. I just wanted you to know that I am really enjoying your blog!
Yes – I used to do the ‘ice cube’ baby food. I liked it (my mom thought I was nuts but she doesn’t like the clothe daipers I use either) and soon will be at that stage with #4 again.
You use NT? I love it and have access to healthy raw dairy products which I just LOVE!
Andrea
Elavil drug test.
Elavil taken with dexedrine.