Preserving Summer’s Bounty: Canning Pears
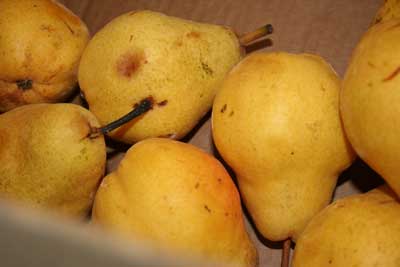
Ripe (very, very ripe) pears waiting to be peeled and cut. I bought a 25 lb box of Bartlett pears several weeks ago and was surprised to come home from a couple days away to discover just how ripe my pears were (since they had still been green the week before)!
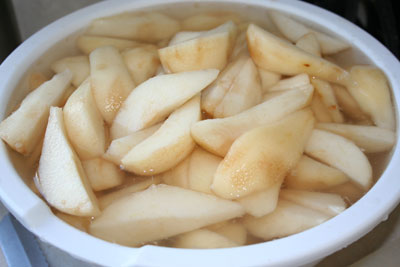
I sprang into action by peeling and cutting, then putting the slices into a bowl of cool water with lemon juice added in to help keep them from browning too much. Peeling and cutting over-ripe pears can be a bit challenging. As I went on, I discovered that it was easiest to peel them whole (holding them very gently), and then core and slice them after. This seemed to prevent them from bruising or smooshing (a very technical term, indeed) as I did it.
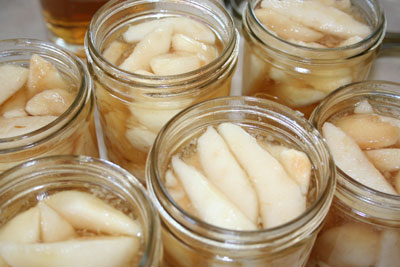
After sanitizing the jars in my dishwasher, I heat them up on a cookie tray in the oven. I usually turn the oven to around 200 F and let them stay there for a good 10 minutes (or until I suddenly remember them!). The point of this is to further sanitize and to have the jars warm enough so that they don’t crack when being put into the hot water in the canner.
I canned my pears in a light syrup. I used a scant 1 cup of sugar (a raw sugar like Rapdura or Sucanat is best) for every 1 litre (quart) of filtered water. I bring the water and sugar to a boil (stirring in the beginning to make sure the sugar dissolves completely). You could also use honey, and would only need about 1/2-3/4 of a cup to achieve the same sweetness of a light syrup.
After filling the clean, hot jars with pear slices, I filled them up with the hot syrup leaving a 1/2 inch of headroom.
Next, I wiped off the jar mouths with a clean cloth, and put sanitized jar lids on top, then screwed on the metal screw tops tightly. To sanitize your lids, bring a small pot of water to a boil. Once it has boiled, turn the water off and add the lids to the hot water (not while it’s still at a rolling boil, as this can ruin the lid’s sealing ability). Let them sit in the hot water for a couple of minutes before removing to put on top of the prepared jars.
In the boiling water bath, pears require:
Pints- 20 minutes
Quarts- 25 minutes
Make sure that you begin timing only once the water in the canner is at a rolling boil (it sometimes requires a few minutes with the lid back on after you have added all of the jars inside), and that there is at least 1 to 2 inches of water above the top of each jar to ensure sufficient pressure to seal the jar lids.
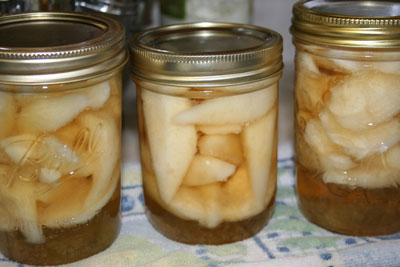
Once the timer has gone off, I carefully remove the hot jars using canning tongs and I set them on several folded kitchen towels on the counter (to protect the counter from the heat). Listen during the next 30 minutes for a “pop” sound, indicating that the jars have sealed. If you’re unsure (and I often miss hearing them seal), go over afterwords and lightly tap on the center of the lid. If it doesn’t move, then it’s already sealed. If it moves up and down or you can feel it push down when you first tap it, then it wasn’t sealed properly. You can re-process these jars in the boiling-water bath once more (do the full 20 or 25 minutes again), and it’s a good idea to take the lid and screw top off and re-tighten them before doing so.
After the jars are completely cooled off, I remove the screw bands to use on other canning projects. This also gives me the chance to see whether there are any without a completed seal. I stick these jars in the fridge and we will use them up within a week or two. The rest I store in my pantry or some other cool, dark place, and they are thoroughly enjoyed throughout the rest of the year!
That’s it! These pears are perfect for adding to a pancake or waffle breakfast, to add to yogurt, or to just put in a bowl and eat plain. My kids and husband adore them!
I also dehydrated some pear slices this year, as well as turning quite a few of them into fruit leather. They’re such a versatile fruit!
What do you like to do with pears when they are ripe and in abundance? Any other questions on the canning process?



Wonderful instructions! I have a question: I kind of make up my own recipes for fruit butters, etc but I’m afraid to can them because I’ve seen some books warn to follow recipes exactly or certain food combinations can be dangerous. Is this only with tomatoes that it’s a concern?
Thanks! Canning has always seemed like some unknowable process to me…but I think I could actually do all that! I remember my mom and aunts and grandma canning things in the fall- I would love to give it a try!
Jars in the oven! Brilliant! I’ll remember this little tip for my next canning day.
I was gifted with pears over the weekend – not like yours though. There are winter pears (neoli) I believe. Anyway, we will be using your post as a guide to get these saved up for the winter.
Thank you for posting this today!
Those were Bosc? They look like Bartlett.
I’m sure you’ll be enjoying these thru the winter. Thank you for the instructions.
I bought some pears that were VERY ripe, and I made pear sauce. It’s the same process as apple sauce, and same water bath time as apple sauce. The pears mush up easier than apples, so instead of putting them through a food mill I just used an immersion blender right in the stock pot I cooked them in, and it worked extremely well. I did not add any sugar, as I thought it was fine without it. A 1/2 bushel of pears made 16 pints of pear sauce.
Jeana, from what I can see it’s okay if the recipes differ slightly. In Putting Food By (one of the standard preserving books), they give these general instructions for any sort of fruit butter: 1/2 pint or pint jars, with 1/2 inch of headroom, packed with hot fruit butter, and put in a boiling-water bath for 10 minutes.
Kathryn, yup, thanks for catching my mistake. They are definitely Bartlett, not Bosch! I’ll fix that!
You are brave- canning pears. I tried that one year and got really frustrated with how long it took me! I canned them in a water/apple juice solution. How long did it take you? Where did you buy your pears?
This year I was given some pears so I dehydrated them. That seemed to be simple and fast! Especially with everything else that was going on at the time. They are interesting that way. I do prefer dried apples or peaches instead though.
I like the idea of pear sauce! Might have to try that sometime.
good tutorial.
I did a lot of canning/freezing for the first time this year. pickyourown.org was very helpful in how to do both and what can be canned and what should not, like pumpkin puree should not be canned.
Nola, it probably took me about 4-5 hours to deal with 25 lbs of pears (including drying some), maybe a bit more including re-processing a few jars that didn’t seal. It was definitely time consuming, but I know that my family really loves them this way, so I decided to just do it anyways. I got them all through my MIL, who purchased a huge crate of them with a bunch of families from her church, so the price was really great!
Paula, I also like the site pickyourown.org for info on canning!
looks good… I’ve only canned peppers and tomatoes before, but will have to try this. I love pears!
I haven’t done any pears yet, but I think I’ve done about everything else so far this year! I did pickeled peaches for the first time this year and they are AMAZING! That will be a yearly traditin from now on! If you haven’t tried them, you should! I’ll have to try pears next. I also really liked the idea someone else mentioned of pear sauce.
I would love to try this. Do you have an actual canner or just use a stock pot? Any other things to have around? Timing of canning for different produce? I’d love a “primer” on canning… If you have already posted this info before, can you direct me to that post?
Another question: where would I buy 25 lbs of anything?
Thanks!!
One thing I learned this year (with my 50lbs of pairs) is that an apple slicer works great on pears too! I peeled a bunch of them whole, placed them in ice cold water with a little lemon juice, then used the apple slicer/corer on each of them. It was so fast! In just one slice the entire pear is cored and sliced.
Love you blog!
Kelly, pickled peaches sounds so interesting! I’ll have to look into that!
Magda, I use an actual canning pot, which is really helpful because it has a rack that the jars fit into and it is a bit taller and wider than many stock pots. You can often find them used, at thrift stores, garage sales and on craigslist. Well worth it! I haven’t written any sort of primer on canning as of yet, though I have another post coming on canning tomatoes. If you’re interested in a book, though, I would highly recommend “Putting Food By”. It is an old classic that has been updated and revised, and it tells you how to do absolutely everything! As for buying 25 lbs of something, try a produce market. My local produce market sells everything in bins, just like a regular grocery store, but if you go in the back and talk to a staff member, you can buy things by the box as well. Most places will let you do this. I would even ask the produce manager at your grocery store if you don’t have a market nearby, as they will sometimes accommodate this as well, and possibly even give you a better deal.
Yay! I’m going to be canning pears tonight! This weekend was all about tomatoes and plums – but tonight, it’s PEARS! I’m contemplating a concoction called Pear Honey – if I have enough pears left over, I might either dry some, or maybe jam. Or maybe just jar them up plain. Or maybe… 🙂
Wow! Nice pics! Hubby brought home 1000 apples a few weeks ago! *fainting* I did apple butter,jam,sauce and juice with them.:o)
wow this looks really good. Thanks I love pears