Fabulous Fruit Pizza {Kids in the Kitchen Summertime FUN!}
By Kelly, Contributing Writer
Summertime is the perfect time for cooking with kids! For us busy moms, the slower pace of summer often makes it a bit easier to orchestrate than during the school year when life can be, well, a bit chaotic to say the least.
And spending time in the kitchen with your kiddos is definitely time well spent, because it not only provides many opportunities to teach practical life skills, but, best of all, it provides a wonderful opportunity to build special memories that last a lifetime!
This simple and delicious recipe is a wonderful summertime dessert that kids of all ages love to make! So whether you’re just getting started, or have been cooking with your kids for years, I encourage you to gather your children around the kitchen this summer to give this deliciously fun and healthy recipe a try!
And, if you’re looking for even more ideas and recipes for cooking with your kids, be sure to check out my Kids in the Kitchen Summer School Series.
Fabulous Fruit Pizza in Five Easy Steps!
A simple and fun recipe for teaching kids to measure, mix, slice and bake!
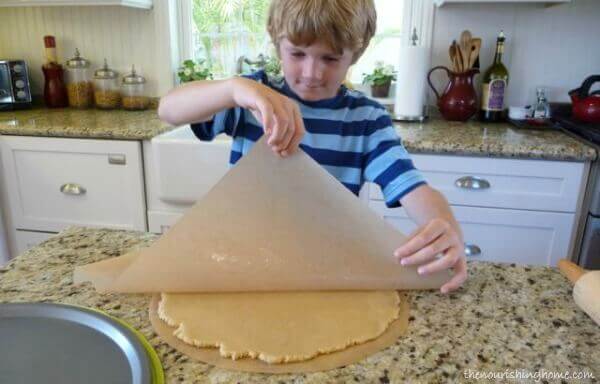
Step One: Gather your kiddos together and prepare the cookie dough according to recipe instructions. Then, roll out the dough between two sheets of parchment, as described in the recipe notes below. Next, bake the cookie crust and allow it to cool completely.
You can use just about any “sugar” cookie recipe as the base for this yummy fruit pizza. In case you’re looking for one, here are a few real food versions you might want to try:
• Grain-Free “Sugar” Cookies
• Gluten-Free “Sugar” Cookies
• Whole Grain “Sugar” Cookies
• Whole Grain Orange Shortbread Cookies
• Chocolate Whole Grain “Sugar” Cookies
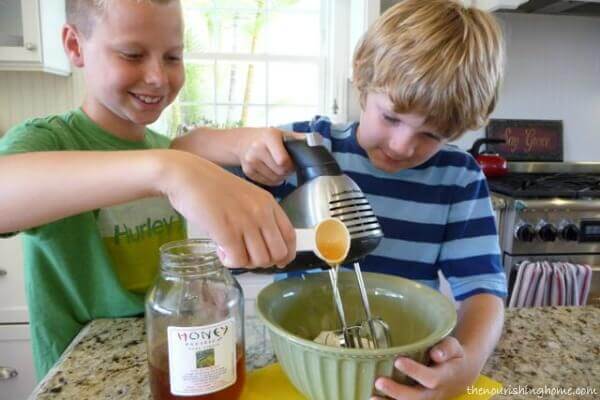
Step Two: While the cookie crust is cooling, work together to make the cream cheese frosting. Kids love using a hand mixer. Just remind them to keep the beaters in the bowl – flying frosting is not as fun to clean up as it is to eat!

Step Three: Once the cookie crust is completely cool, it’s time to spread the frosting. This is a fun way to teach your kids how to use a spreader. And if you love lemon, zest a small lemon and sprinkle it across the top of the frosting for a delicious burst of lemony-goodness!
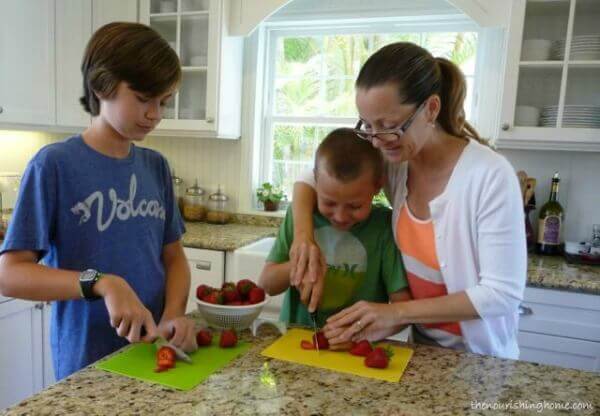
Step Four: For older children, this recipe provides an opportunity to teach basic peeling and slicing skills. It’s important to correctly teach your children how to use sharp tools safely by first demonstrating how to properly use the tool, followed by assisting them in using the tool correctly, and then finally by carefully supervising them as they use the tool on their own. (For detailed tips and techniques for teaching your children basic cooking skills, be sure to check out my Kids in the Kitchen Summer School Series.)
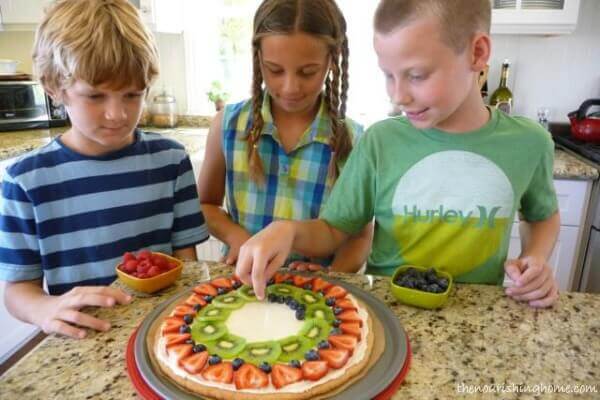
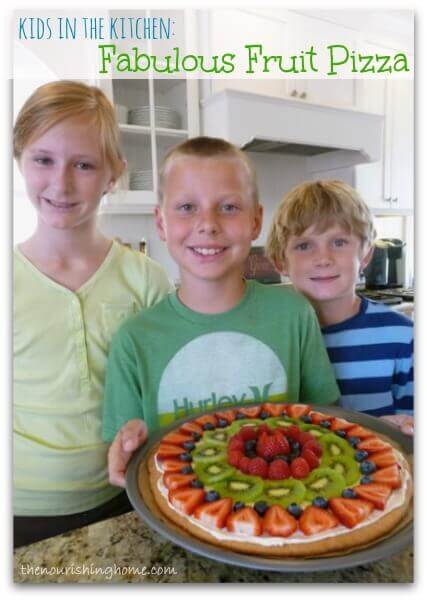
Step Five: Have your kiddos take turns using the sliced fresh fruit to create a pleasing pattern – circular designs are a simple, yet beautiful way to create a truly fabulous fruit pizza!
Remember, no matter the age or skill level of your child, there’s always a task that any child can do. For young children, simply learning to add ingredients and mix them together is a fun way to start. For older children, get them involved with overseeing a recipe from start to finish, as well as continue building their skills by giving them more complex age-appropriate tasks.
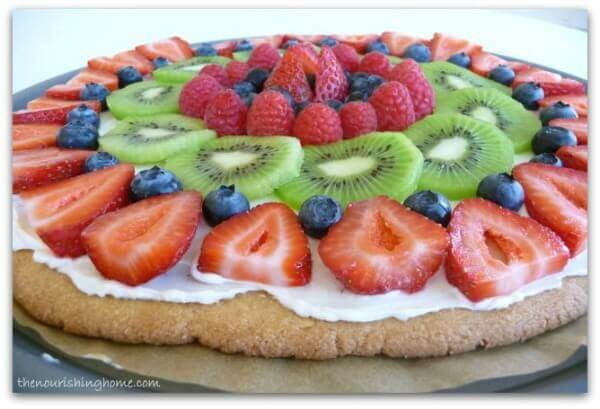
YUM! Now it’s time to enjoy the fruits of your labor (pun intended!) … What a delicious summertime dessert that’s as fun to make as it is to eat together!
Fabulous Fruit Pizza
Ingredients
- Your favorite real food “sugar” cookie dough see recommended recipes above
- 8 oz. regular or cultured cream cheese, room temperature
- 2 tbsp raw honey
- 1 tsp pure vanilla extract
- Assorted fresh organic fruits such as summer berries, kiwi, pineapple, bananas, etc.
Instructions
- Preheat oven to 350 degrees. Cut a sheet of parchment paper to fit a 13” to 15” round pizza pan or small baking sheet.
- Prepare cookie dough according to recipe instructions. Then, shape the cookie dough into a large ball and place it on the parchment cut-out. (The parchment cut-out should be on your countertop so you can more easily roll-out the dough.)
- Cover dough with a second larger sheet of parchment paper and use a roller to roll out the dough between the two sheets of parchment to almost the same size as the bottom parchment cut-out (see photo in “step one” above).
- Remove the top sheet of parchment. Then carefully slide the cookie dough onto the pizza pan (or baking sheet) by pulling it along by the parchment cut-out. (The cookie crust should remain on the parchment cut-out.)
- Bake the cookie crust until firm to touch and slightly golden brown around the edges (about 10-15 minutes, depending on the recipe used). Allow to cool completely.
- While cookie crust is cooling, prepare the cream cheese frosting. In a medium bowl, using an electric mixer, blend the cream cheese, honey and vanilla until smooth and creamy. Cover and leave on the counter (do not refrigerate).
- Next, peel and slice an assortment of your favorite seasonal fruit.
- Then, spread the cooled cookie crust with the cream cheese mixture and decorate with sliced fruit arranged in a decorative pattern.
- Place the fruit pizza in the fridge for about 30-45 minutes to chill. Then slice and enjoy!
- Please note: Due to the moist ingredients, the crust will soften the longer it sits. So for best results, serve the fruit pizza within an hour or so of decorating it.
What are your favorite tips, recipes and strategies for cooking with kids?
(If you have some Kids in the Kitchen tips, personal stories to share, or questions about cooking with kiddos, please feel free to leave a comment. It’s a great way for all of us to encourage one another in enjoying more time in the kitchen with our children!)
 This post is sponsored by Plan To Eat. Plan To Eat was born from our desire to eat real food — great food — prepared at home, together as a family. Plan to Eat is an online menu planner that uses your recipes, scheduled for the days you want them, automatically generating your grocery list, organized the way you like to shop. Eat well. Eat together.





I got a (huge) “Messy Mat” to catch all the spills, drips and splashes from my preschool kitchen helper. Towels were never big enough and disposable plastic tablecloths don’t last long enough, so I finally invested in some water-resistant fabric with a bright and fun pattern from the craft store. It’s a perfect solution – plenty large, heavy enough to lie flat, and super easy to wipe down and store for the next time. …Works great a picnic “blanket” or an under-high chair floor covering, too!
What a great idea, Dena! Thank you so much for taking the time to share with us! Blessings, Kelly 🙂
I am defiantly going to try this in my K-5 building this year at school.
Thanks, Jenny! I’m sure you all will have lots of fun – what an awesome teacher you are!
Thanks Kelly for sharing my cookie recipe! I should do this sometime soon with my kids 🙂
You are SO welcome! I hope you do give this a try. It’s super fun, easy and yummy! And of course a great way to enjoy time with the kiddos! xoxo
Just wondering if you know what a good dairy free substitute for cream cheese would be?
Hi, Jessica. Great question! You could easily use whipped coconut cream sweetened with a little honey and it would be a wonderful option. Just google search whipped coconut cream and you’ll find some recipes that show you how. Lots of blessings, Kelly
I think a dairy-free lemon curd would be a great substitute here as well!
oooh! I like the way you think, Jennifer!