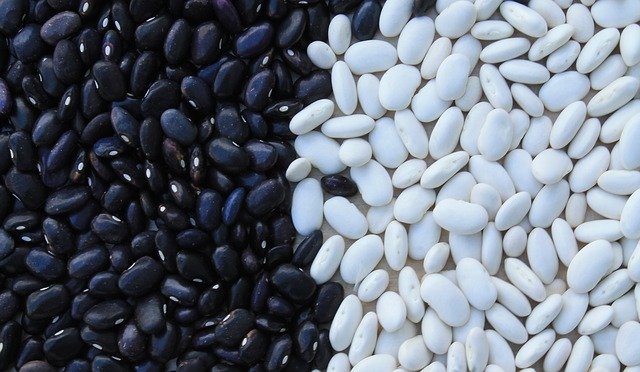
Baby Steps: Cooking Dry Beans
First of all, if you’re new to the Baby Steps series, you can find out what it’s all about here (and welcome!).
Secondly, if you didn’t catch it yesterday, make sure you check out the “Say No to Kraft Dinner” recipe carnival. The purpose of this carnival was to help you complete last week’s Baby Step, creating your own list of 5-10 healthy and fast meals to fall back on when you just don’t have much time or energy for cooking!
This week’s baby step is:
To learn how to prepare dry beans, rather than using canned, and to try doing it once in the next week (you could incorporate a bean meal into your menu plan for added motivation, if you want)!
Why this step is important:
For a few reasons… one of the main ones being that they are just cheaper! In my frugality, I cannot bring myself to buy canned what I can easily prepare myself.
I purchase large bags of organic dried beans at around $4.50-7.00 per 5 lb bag. I can’t even easily guesstimate just how many cans of beans that would equal, but I am thinking certainly at least 20 (it’s probably far more than that). If one can costs around $1 (and I know this widely varies depending where you live), then that’s a 65-75% savings (not to mention getting them organic instead)!
A second good reason is that you may have heard that BPA not only leaches into the plastic used for water battles, baby bottles, sippy cups, etc. but it also leaches through the linings in metals cans (I hope to post on this more soon). So, the less canned foods you can use, the better!
I can’t actually find any information stating definitively that dry beans have more nutritional value than canned, but they certainly seem to be fresher. Some canned beans may have preservatives in them, so with dry you always know what you are getting. Most canned beans also have salt in them, and it is just regular, iodized table salt, which is not preferable (natural sea salt is), so that is yet another reason to give dry beans a thumbs up.
And gosh, beans are just so good for you– high in fiber, nutrients, protein… I’m sure you’ve heard it before!
How to get started with it:
Honestly, there’s very little to it. Here’s how I cook my own beans:
- Get out a medium sized pot with a lid. Add your dried beans to the pot (keep in mind that they basically triple when cooked- see links below for dry to cooked ratios).
- Add
enough warm water so that it is several inches higher than the dried beans
(if doesn’t matter if you add too much water, so err on the side of too
much). Add 1 Tbsp acidic medium (whey, lemon juice, kefir, yogurt, buttermilk, apple cider vinegar) per cup of dried beans (see note below for more on this). Then, you can go to bed! - The next day (I often do mine in
the morning, while cooking, serving and cleaning up breakfast- just make sure that they have a solid 10-12 hours to soak, or even longer),
continue by pouring out the soaking water, adding fresh water (again, several inches above the beans) and turning the burner on to high. - Bring the water to a boil,
skim off any foam that rises to the top, and then turn it to low and
allow the beans to simmer (covered) until tender, usually about one
hour (large beans will take longer, small ones take less time- see cooking guides below). - Drain the water, and rinse the beans under cool water, and set
aside until later.
Step 2 mentions the use of an acidic medium in the soaking water. This is necessary for these types of beans: black beans, lentils, chickpeas and fava beans.
For dried and split peas, add a pinch of baking soda instead. And for kidney, pinto, black-eyed peas and all other brown and white peas (ie. cannellini, etc.) plain, warm water is sufficient.
(These instructions are coming from a combination of Nourishing Traditions and this Weston Price site article)
Now, you can use your beans immediately in soups, casseroles, salads, pastas, spreads and dips, etc. or if you’ve made too many, you can put them in a container and freeze them. I have often done this and the results are just fine (in my opinion). They will also keep for about a week in the fridge, which gives you an option for a quick meal.
Online Resources:
Great page on cooking methods for beans, peas and lentils, including tips on specific types of beans
Ten reasons soaking dried beans can change your life
Putting the Polish on Those Humble Beans
Bean Recipes (just a very few recipes to get you going if you don’t often use beans):
Bean recipes from Real Simple (I can’t guarantee all the recipes are healthy, but this will give you some inspiration in using your beans, anyways!)
Quinoa and Black Beans
Does anyone have any Baby Steps victories to share with us? How are things going for you? What changes have you been making? We’d all love to hear and be encouraged!


How funny! I was reflecting on the virtues of cooking my own dried beans just last week. I managed to make a huge batch of homemade “refried” black beans. It was nice to see how inexpensive they were compared to canned beans, and they provided some much-needed extra calories for my husband at breakfast each day.
I’ve also read about people cooking dried beans in a crockpot after soaking. That makes a lot of sense to me. Pop them in a bowl of water to soak overnight, then toss them in a crockpot to cook all day. Pretty low-maintenance. And you’re right, beans do freeze well. Hmmm…I think it’s time to end the canned bean tyranny in my kitchen. 🙂
Soaking your bean is important, but you also need to add an acidic medium to them to help break down the Phytic acid. This can be whey, buttermilk, yogurt, vinegar or lemon juice. When soaked in a solution of water and one of these items, the phytic acid breaks down, allowing your body to be able to absorb all the nutrients in the beans. You need to soak for a minimum of 12 hours for best results. For each up of water add 1 tbsp. of whey, buttermilk, yogurt, vinegar or lemon juice. Phytic acid is an anti-nutrient that all seeds have. It’s there to protect the seed and make it viable for planting/growing. When you eat seeds without soaking first, phytic acid blocks your body from absorbing the nutrients.
I like to buy dry beans and prepare them as you mentioned, only for long term storage and convenience, I can them in a pressure canner. I use pint size glass jars and find that this is very convenient for us. I do the work and prep once and have enough beans to last me a few months. The extra canning step only takes an hour and it’s not something that needs 100% of my attention. I set the pressure canner up and then work on something else in the kitchen- it’s not a wasted hour. Especially would you add in the convenience and cost/jar of beans! And as you mentioned- health benefits too, I don’t can with salt.
I will probably be joining in on this baby step. I have just recently been reading about the BPA in canned foods. I typically use a lot of canned beans weekly, so I’m looking to start cooking them myself to get rid of the canned goods. I’m glad you commented about freezing them because that was a question I had. Do you add an acidic medium to soak your beans? I’m looking forward to your post on BPA in cans because right now I’m trying to figure out how to continue using tomato products (sauce, paste, etc) without using cans. Even companies like Eden Foods don’t have BPA-free cans for their tomato products.
Also, I’m having trouble getting your feed to show up in Google Reader. I re-subscribed when you changed your site back to typepad, but the most recent post that’s showing in my reader is the Q&A post from June 1.
I have a different reason for eating dried beans….the result is so much better. I have been eating beans all my life, it is part of my culture and I would NEVER touch the canned ones. Well I don’t buy any canned foods.
One very important thing to know, NEVER ADD SALT to the beans until they are soft, if you do, they will never soften. Osmosis..
I normally eat beans as a soup or stew, I pretty much follow the same steps except for number 5. After 4 I add the spices and vegetables, and keep cooking until they get the flavor, the resulting bean soup is creamy, with what a friend calls a yummy bean gravy.
All I can say is thank you… The Lord has been bringing little things to my attention over the last couple of months. Had I read all of it at once I would have croaked and said it was impossible and been defeated before I ever began.
I started out trying to save money on groceries and one site lead to another and another until I ended up totally redoing my whole philosophy on feeding my family.
I made my son’s (now 2) baby food and even that started me thinking about what was in everything I was feeding my husband and myself…
long story short, we are making our own bread (my 2 year old LOVES to help), drinking kefir, and trying to eliminate prepackaged foods <--- I had no idea how much I relied on canned things. I actually just switched to dried beans this last week and you're right it is much cheaper. I look forward to all of your new posts! Thank you so much -Mandi- mandibarnett@gmail.com
Steph, you are doing a great job on providing baby steps for everyone! I love home cooked beans!
Hi Stephanie!
This is a great baby step. I didn’t realize we needed the acidic medium when soaking beans – I will do that next time. I actually cooked a batch of chick peas yesterday; I’m going to use some to make chick-pea burgers this week-end, and freeze the rest. What I actually did was soak during the DAY (bizarre, I know. lol), and then before I went to bed last night, I put them in the slow cooker, with 3 parts water to 1 part beans, and cooked on low for 12 hours. When I woke up this morning they were done to perfection!! When I cooked them the traditional way, I always found my chick peas still a bit on the hard side, but these ones were absolutely perfect! So I will be using my crock pot from here on in. 🙂 Also, by cooking them overnight, they’re ready to go in the morning for whatever recipe I plan to use – which is especially helpful if I’m cooking the meal in the crock pot as well.
Looking forward to the next post in your series!
Alissa
I cook my dry beans by putting them in a pressure cooker dry, with a lot of water and about 1 Tbsp oil. Then I pressure cook them until the weight on the top has been rattling for about a half hour. I run cool water over the cooker to cool it (or just let it set to cool if I’m cooking pinto beans, since they take a bit longer), and the beans are fully done.
I’ve never heard of adding an acid for some beans. I’ll have to try that. Thanks! Great Blog! I’m here from Hands on the Wall blog.
what about canning the beans without the pressure cooker, with a normal canner? What is the procedure for that?
Linda, I’m not actually sure that you can do it without a pressure canner. I would like to try it myself, but so far I haven’t found any info on how to do it safely without a pressure canner. Does anyone else know more about this?
Wow! I have just recently started reading Nourishing Traditions and The Maker’s Diet. I never knew about the longer time soaking. Always did the Quick cook method. Never knew about the acid medium either.
Our family is try to adjust our way of cooking, buying food etc. Looking into organic gardening for next year to see if we can supply all of our needs for veggies this way.
As far as pressure canning. Have never used a pressure cooker/canner. I am going to need to see if I can find someone to teach me the proper way to use this cooking/canning medium. Have heard way too many accidents that happen with this and would like to learn the right way.
Thanks for all that you are offering for others to learn. I have subscribed to alerts of your new blogs.
Thanks for the instructions. After several failures with dry beans a few years ago, I followed your instructions this week and the beans are great. We enjoyed our enchiladas greatly!
I have recently checked out Nourishing Traditions from my library. I’ve been cooking beans as directed in the “basic” recipe and it states that they all (except black beans which can use lemon juice) should be soaked 12-24 hours in 1T whey per cup of beans. Am I missing something or do you have further information that this isn’t necessary for certain types of beans?
I’m new to all this and just trying to figure it all out. Thanks!
I am wondering why the beans have to soak in warm water with the acidic medium (I use lemon juice, as I need to be dairy-free and it’s cheaper than the Bragg’s raw ACV). Thanks for a great post!
Also, where do you find such a good deal on beans? The best I’ve found is $1.99/lb for organic (bulk).
I found your post through Amy’s link….wonderful! Thank you for all this useful info! I have bookmarked this post for when I do this for the first time.
Alicia
.-= Alicia´s last blog ..Spinach Souffle =-.
Thank you for all the info. I am trying this out today so I hope it goes well!
.-= The Lumberjack’s Wife´s last blog ..Food. =-.
Just as a heads-up: the “Guide to how many dried beans…” link comes up with a shopping page, not the actual tips page.
The first, third, and fourth link under online resources does not take you to a bean cooking page any longer. 🙁 I was looking for info on how long to cook my kidney beans.