Making Homemade Yogurt

Written by Emily, Contributing Writer
I’ve been making homemade yogurt for just about two years now, and I love the convenience, quality, and savings of making yogurt at home.
Yogurt is one of the most basic traditional foods, and even if you are just getting started with real food, including yogurt in your diet is an easy way to reap so many of the health benefits of cultured dairy. One of the main health benefits of yogurt, besides the protein, calcium, vitamins and minerals, are the probiotics. Probiotics are the good bacteria that inhabit our guts and help to promote better digestion and increase our immune systems.
Yogurt is an easily digestible food, and even people who have trouble with lactose intolerance can often eat yogurt because most of the lactose has been “eaten” by the good bacteria during the culturing process.
Making homemade yogurt really is easy, but it can seem kind of overwhelming because it does have a lot of steps. I’m going to walk you, step by step, through my method of making homemade yogurt, and after you’ve done it once or twice, you will be able to figure out what that works best for you and be able to provide your family with fresh made yogurt on a regular basis!
How to Make Homemade Yogurt Using a Crock Pot

Step 1: Turn your crock pot on low to let it heat up. It is important to remember to do this step first so you don’t forget, and so the crock pot is the right temperature when you’re ready to add the milk. Also, take your yogurt starter out of the fridge so it can warm up a little before you add it to your milk.
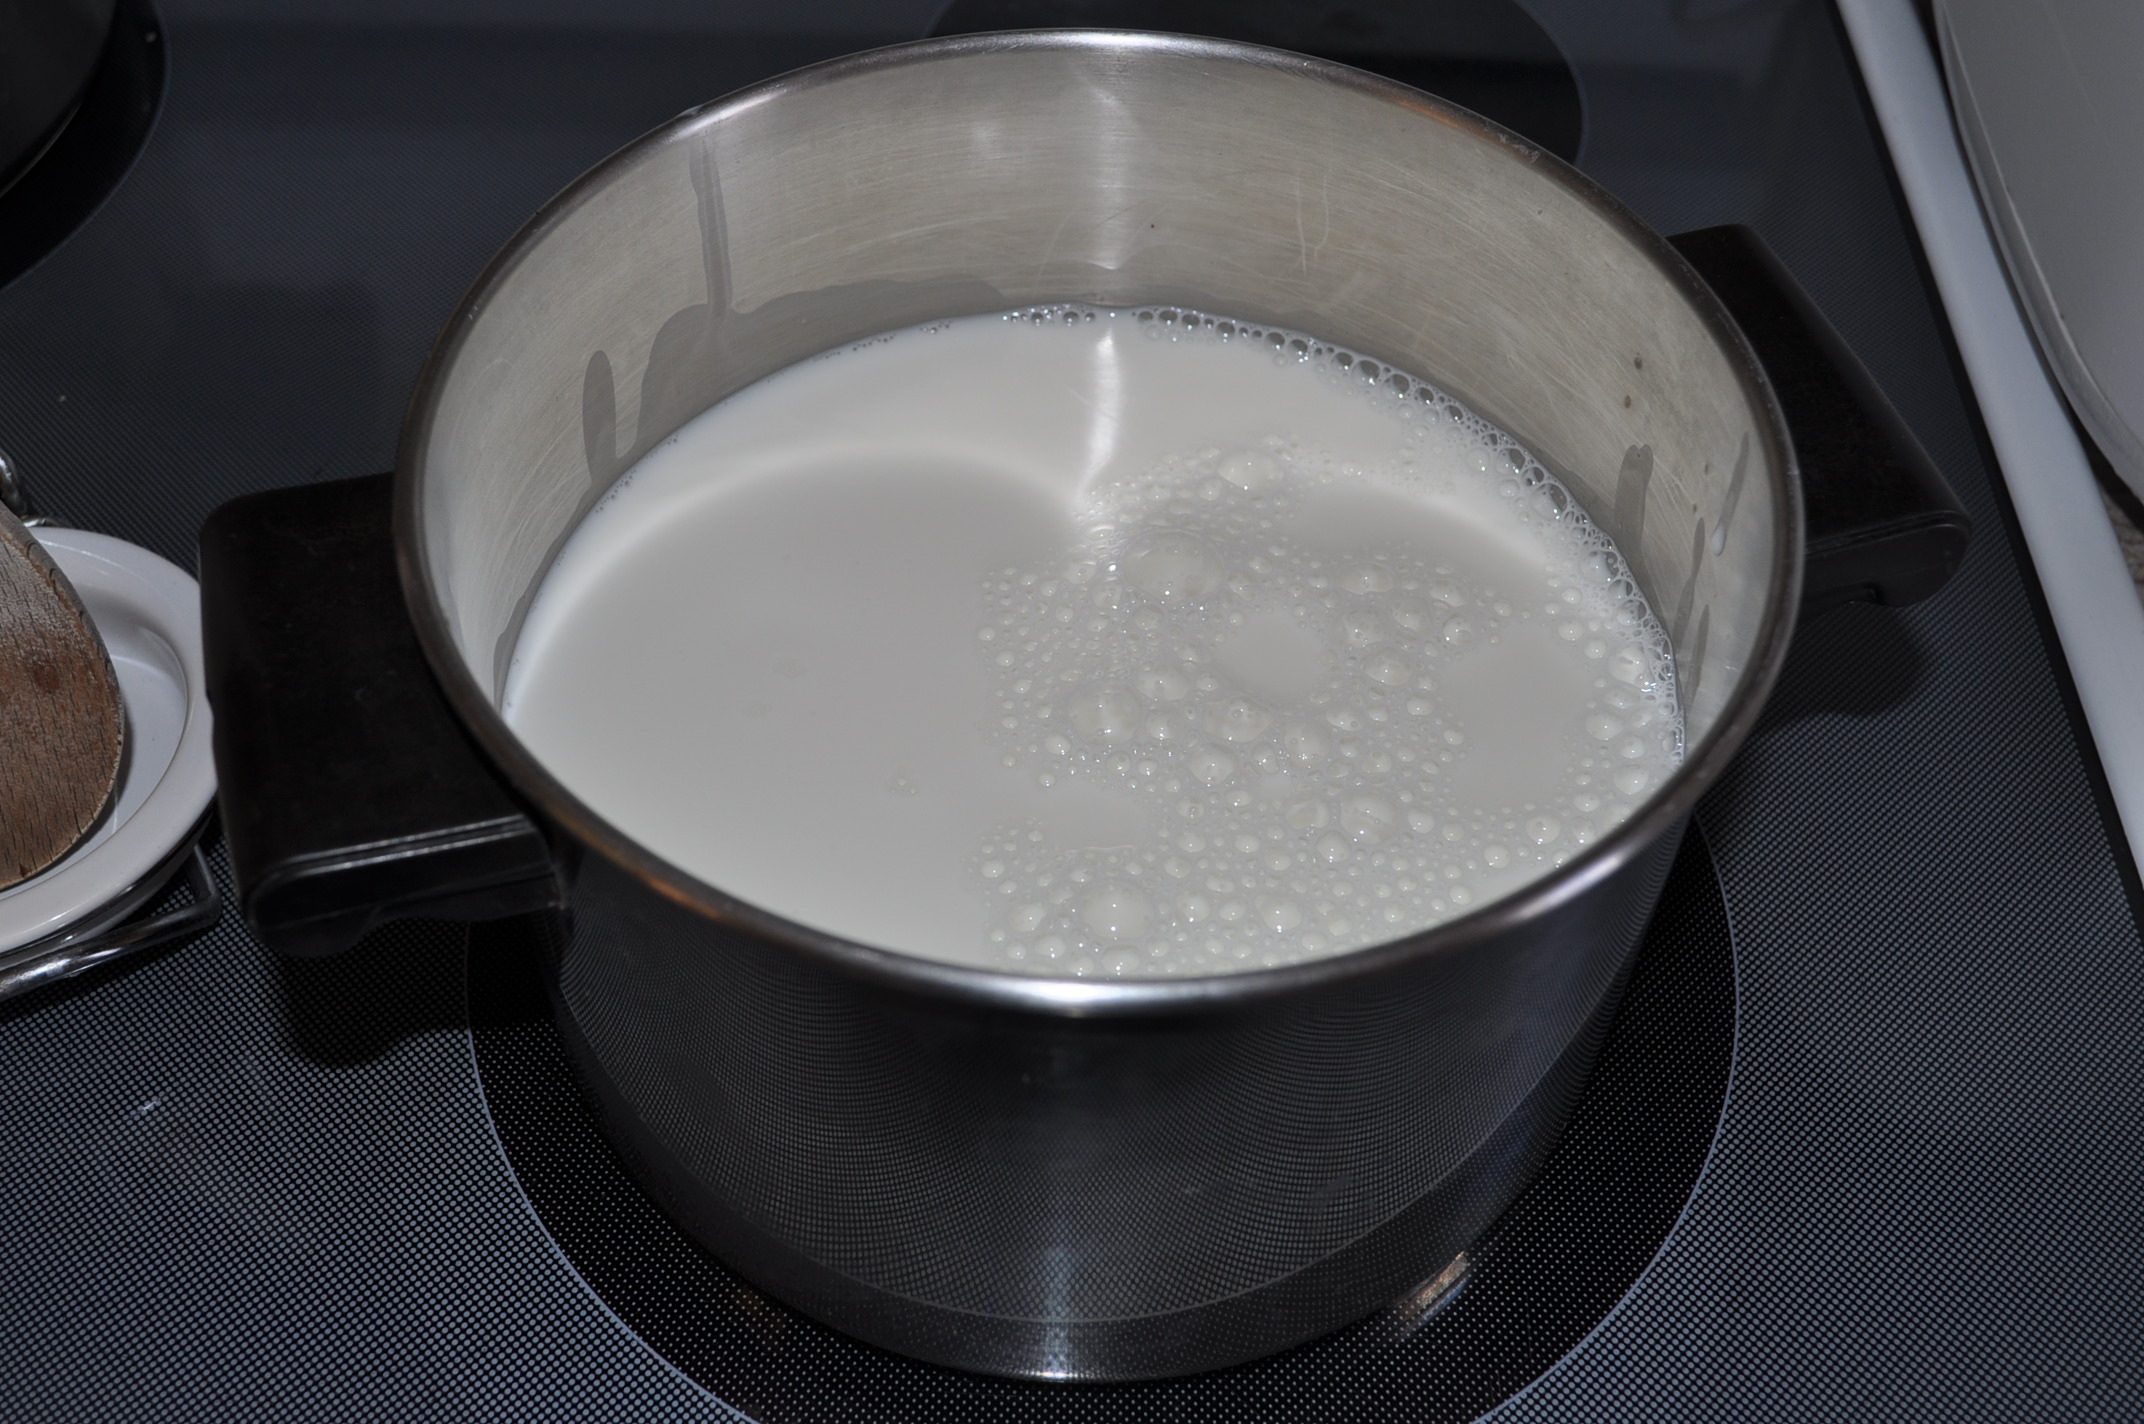
Step 2: Pour your milk into a saucepan and heat over medium heat, stirring occasionally until it reaches 185 degrees. (I have used a candy thermometer I got for $10). You can choose the amount of yogurt that you want to make at a time – I usually make 6-8 cups of yogurt per week. Be careful not to let the milk burn on the bottom of the pan during this step, and also make sure the milk doesn’t boil over – so stir often and keep an eye on it.
*Tip: I have stopped checking the temperature during this step. It’s just one less thing to have to do. When the milk starts getting bubbly and frothy (or it boils over onto your stovetop) you know it’s done.
*During this step I usually get ready for step three by getting the sink of cold water ready.
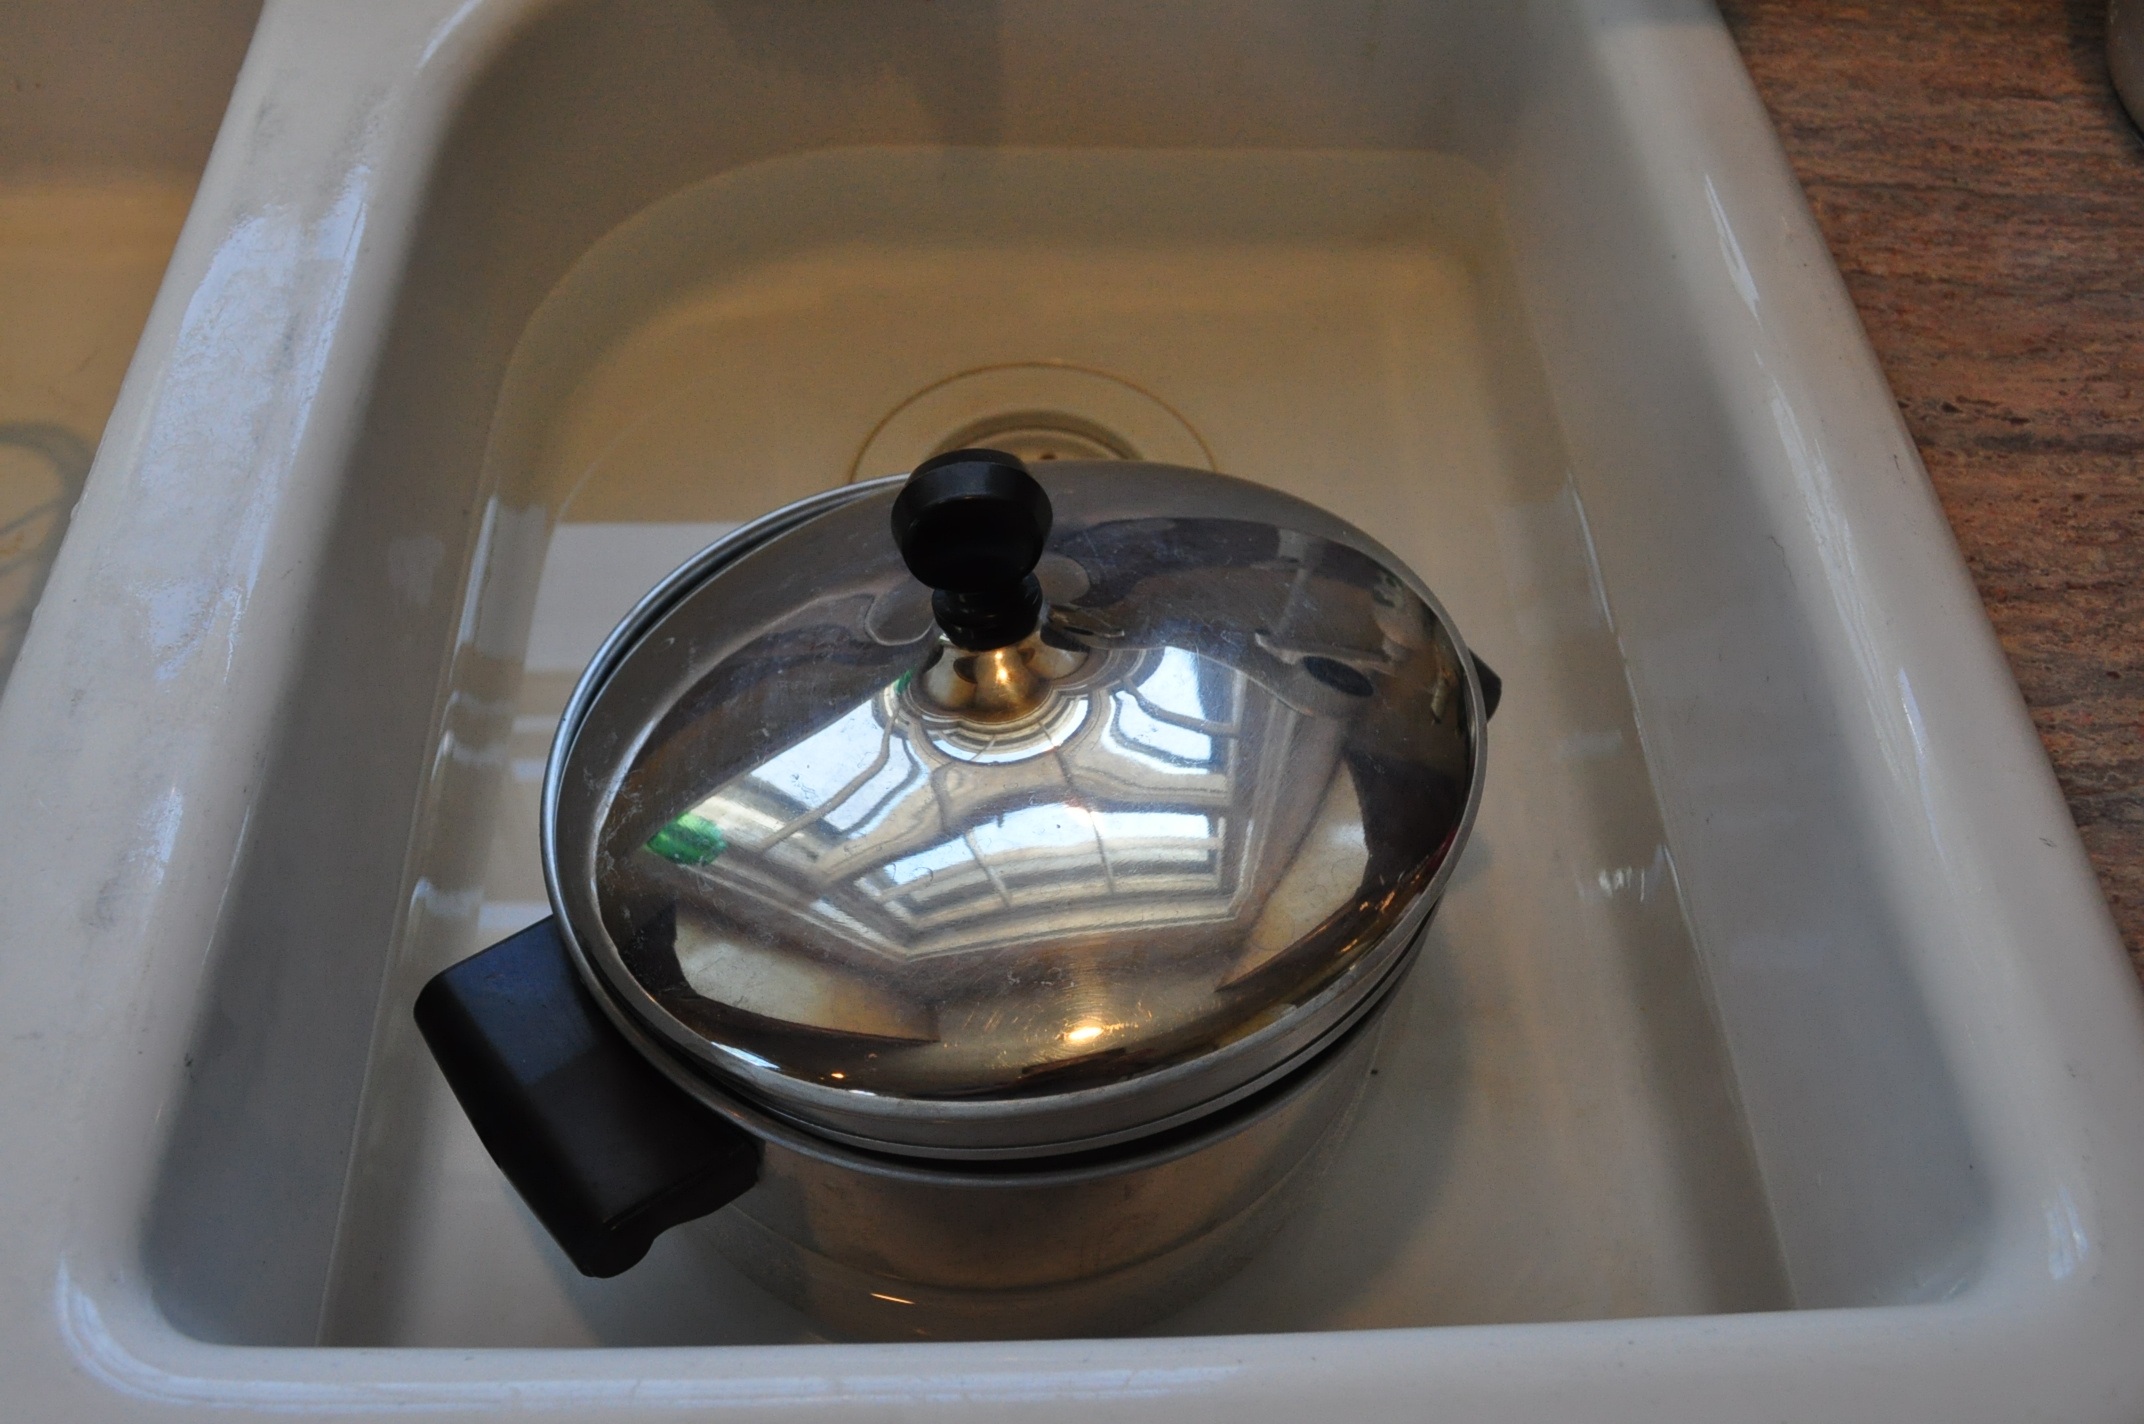
Step 3: Once milk reaches 185 degrees (bubbling) remove from burner, cover with a lid, and place the pan in a sink half full of cold water. (This is kind of obvious, but make sure the water doesn’t go over the top of the pan, just part way up the sides.) You can add ice to the water as well, but I’ve found that it doesn’t really cool the milk down any faster.
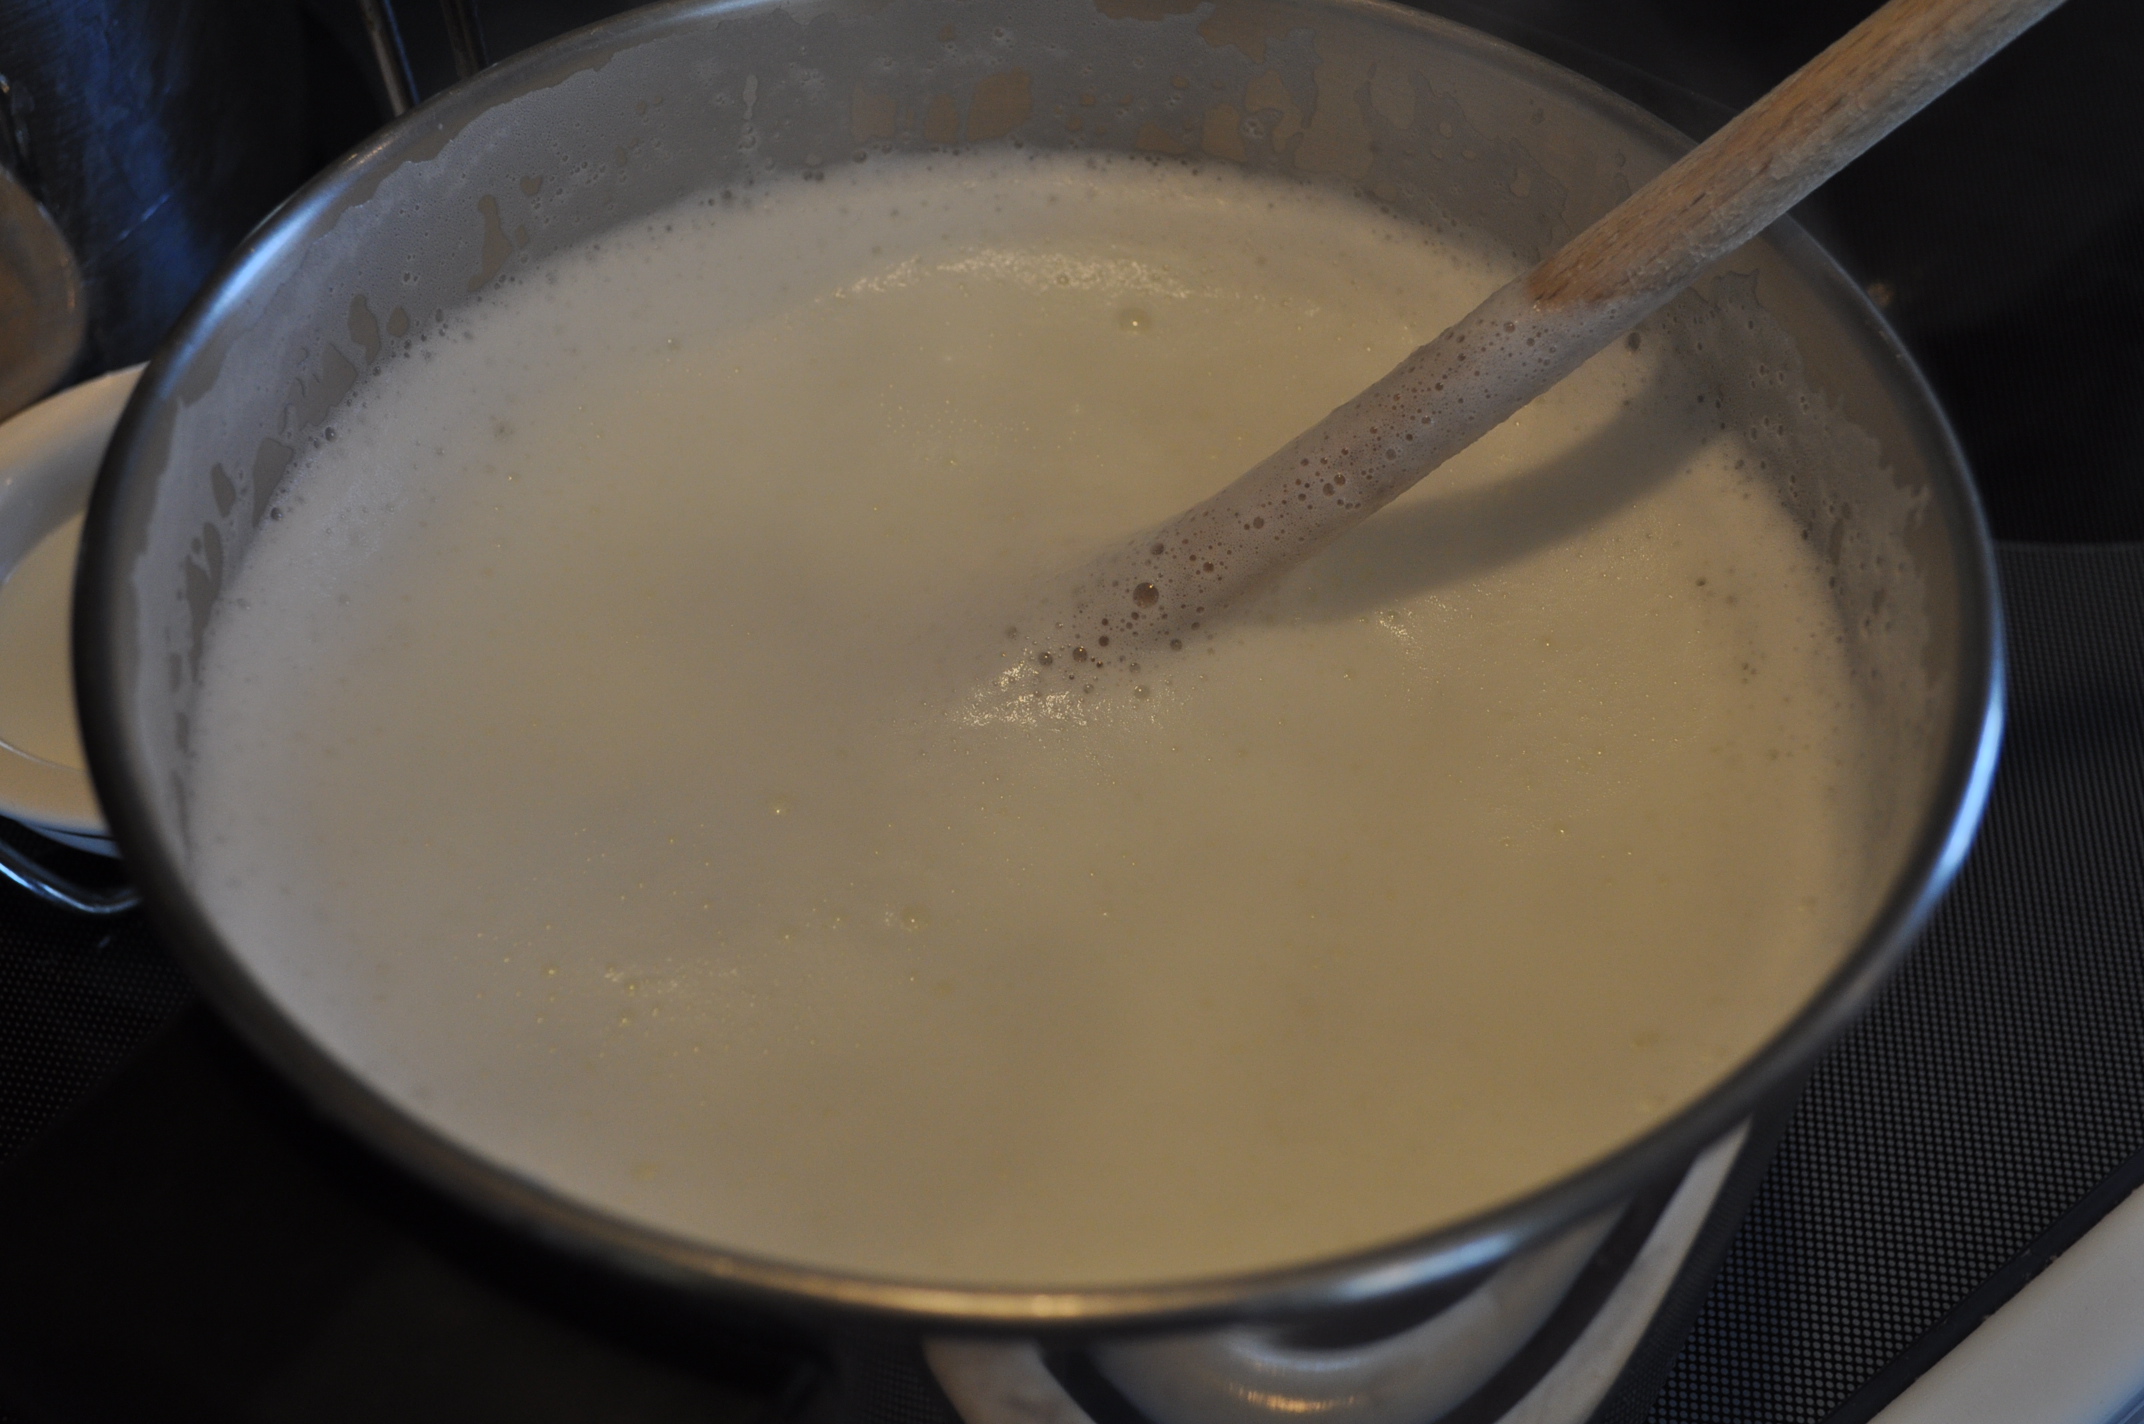
Step 4: Let the milk cool down, stirring occasionally. Once milk has reached between 90 and 110 degrees (I’ve read different temps here, I usually do about 100 degrees), remove pan from water. This usually takes just about 10 minutes for me, so set your timer, so you don’t forget and the milk gets too cold.
*Tip: You can also do this step without a thermometer. After washing my hands, I stick my pinkie into the milk. If it’s painfully hot to the touch, I let it cool a bit longer. If it’s very warm, but not painfully hot, it is about the right temperature.
* While the milk is cooling, get ready for step 5
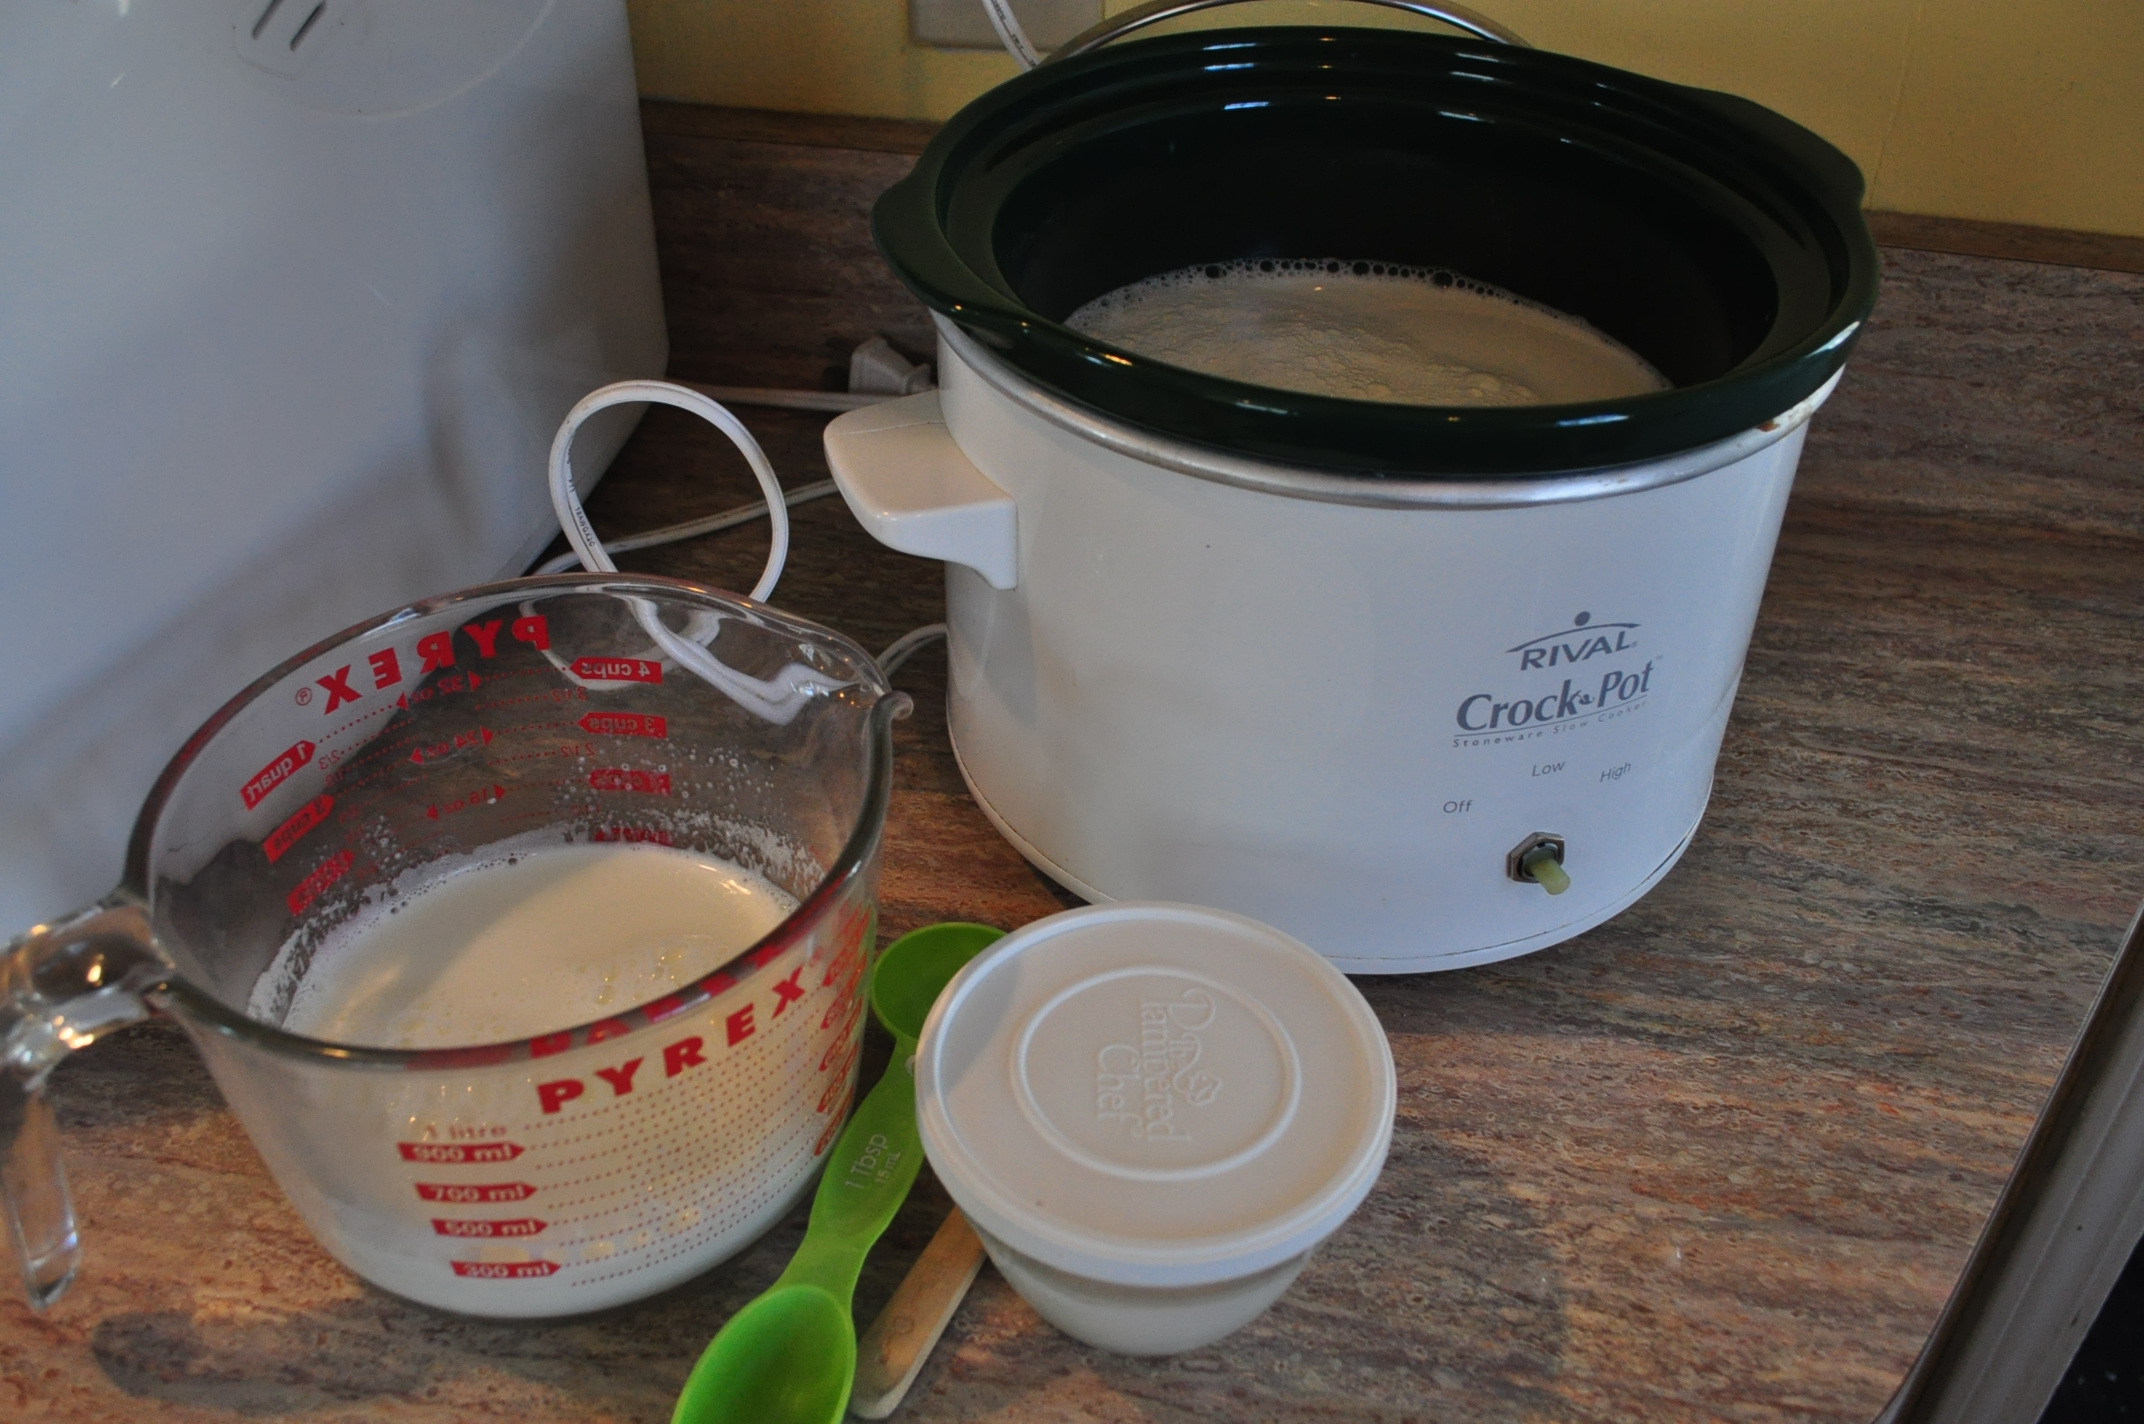
Step 5: Measure yogurt starter into a bowl (I use glass) and pour about a cup of the warm milk over it and stir together. Use 2 Tbsp of yogurt starter per 4 cups of milk. Meanwhile pour remaining milk into heated crockpot. Pour milk and yogurt from bowl into the crockpot and stir it all together.
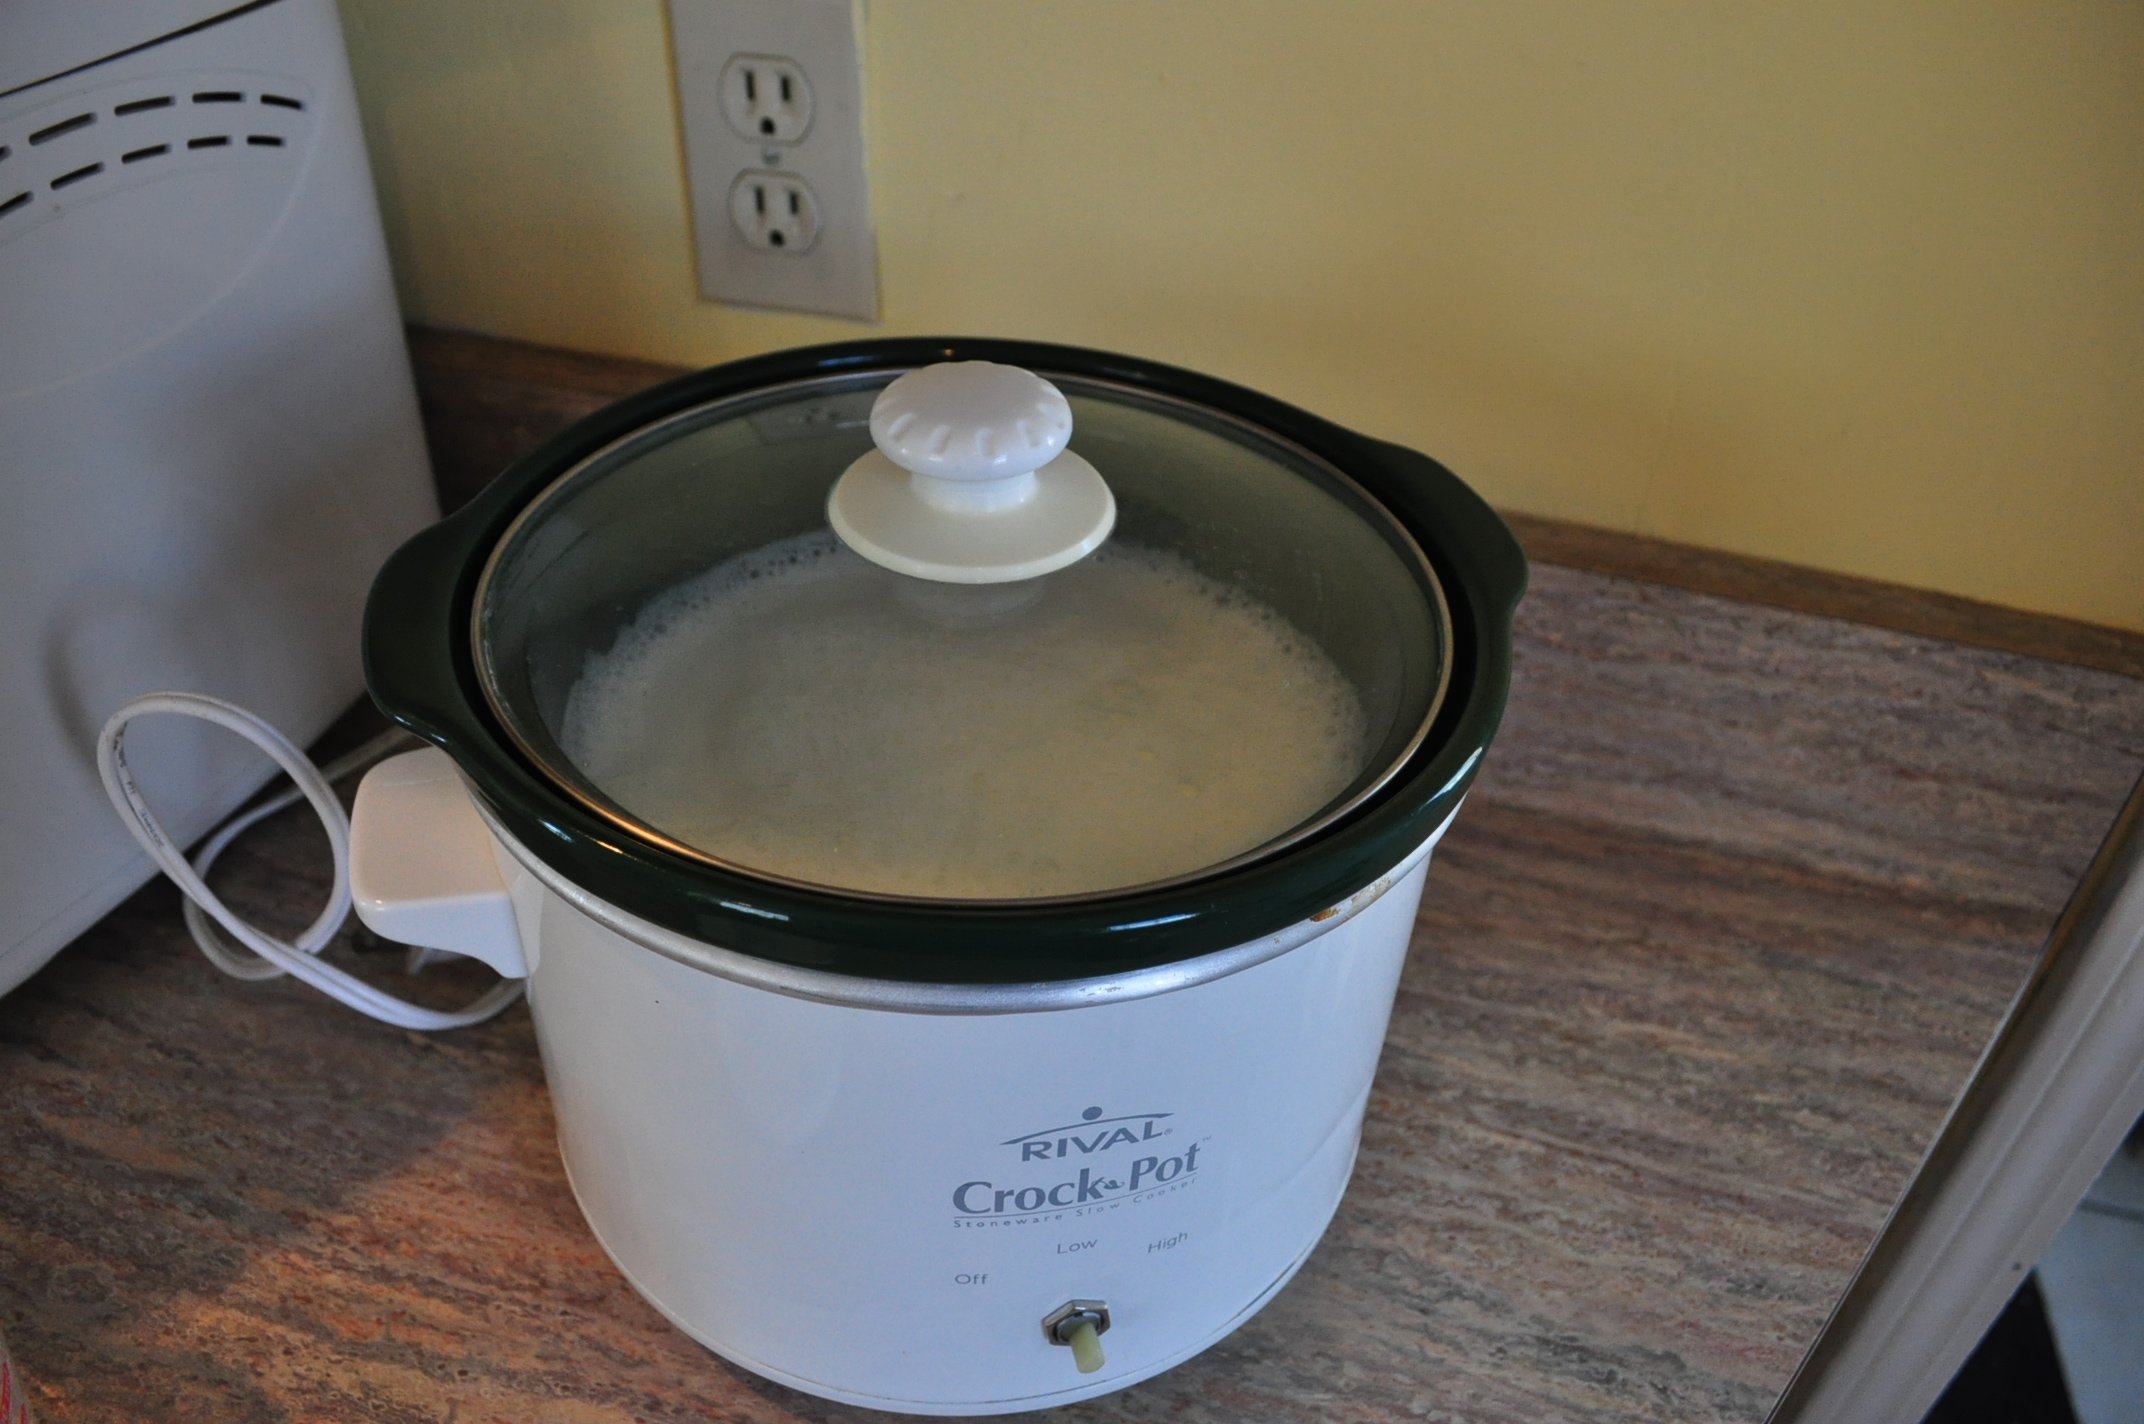
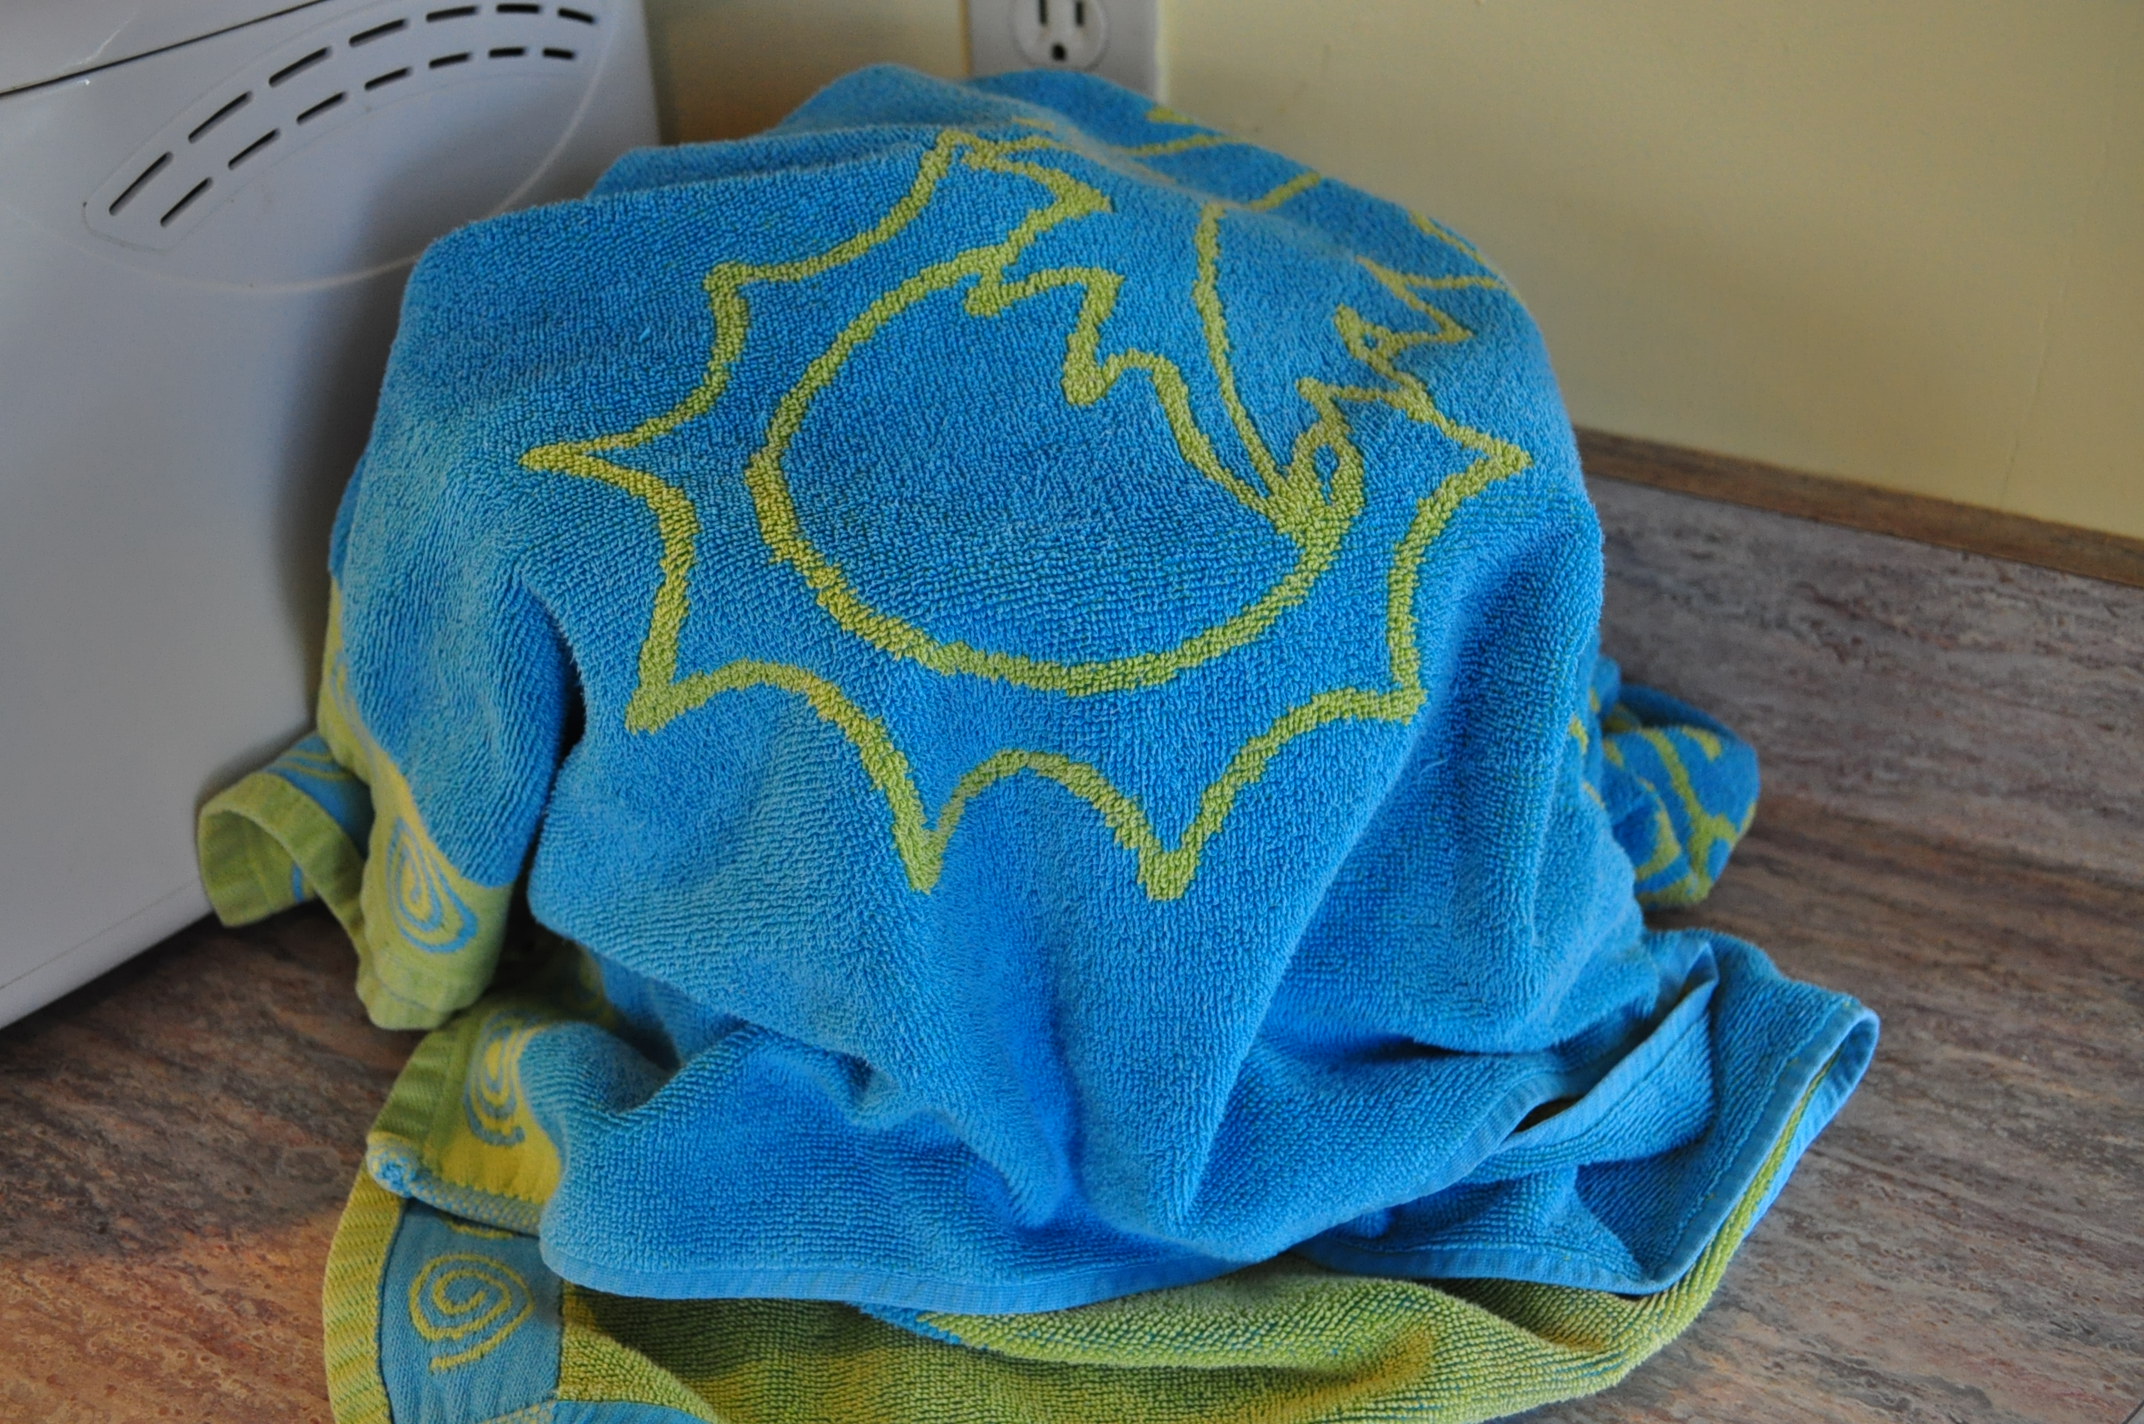 Step 6: Put the lid on, turn off, and unplug the crock pot. Wrap a heavy towel around it. Let sit for 6-10 hours. (I usually do around 8 hours).

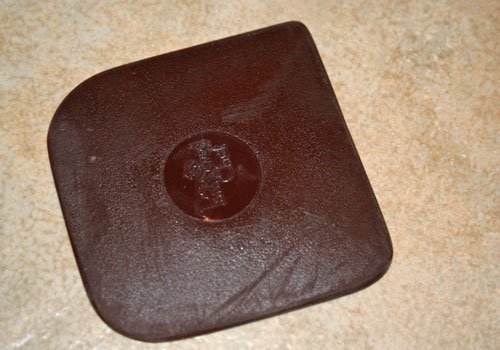
Step 7: After the yogurt has finished culturing, place the crock in fridge to cool yogurt. I have found this step to be really important because it helps the yogurt to set better. Since I started doing this my yogurt has been nice and thick and creamy. Don’t stir or shake your yogurt, it needs to be disrupted as little as possible in order to set well.
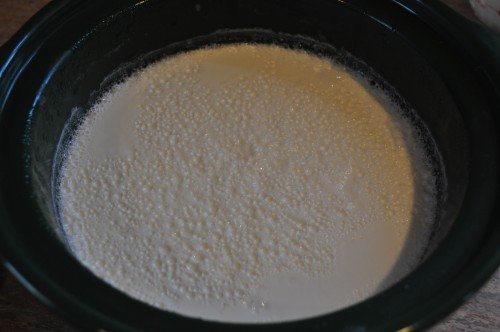
When your yogurt has finished cooling and set, you can ladle it into a glass jar to keep in your fridge. I hope you can tell in the picture that this is finished yogurt, it has set, and is definitely more “solid” than milk. I have found that yogurt will keep for at least 7-10 days, and often it’s still good at around 14 days, if there’s any left of it by that point.
What is yogurt starter?
It is basically just yogurt. You can use the yogurt you just made as starter for your next batch. I usually set aside 1/2 cup of yogurt for starter into a separate small bowl right away, to keep the starter separate from the jar that we are dipping in to eat from every day, and also so we don’t end up eating all the yogurt and I’m left without a starter!
You can also use store bought yogurt, of course, especially if this is your first batch of homemade yogurt or you feel like your homemade yogurt starter is getting weak. Just make sure that your store bought yogurt is plain, unsweetened, with nothing added, and it should save “Live and Active Cultures” on the label.
Stephanie’s note: Though I also generally do the same as Emily, starting with plain store bought yogurt and then saving some each time to make my new batch, you can also purchase yogurt starter cultures for some unique types of yogurt or just regular yogurt, from Cultures for Health. Once you’ve used these to get started, then you can continue to set aside your homemade yogurt for making more.

Our family’s favorite way to eat homemade yogurt is with a drizzle of raw honey and fresh or frozen fruit. Yum! It’s also great with a sprinkle of nuts, or on top of homemade granola.
You can also use homemade yogurt in lots of different kinds of recipes. Here’s a few for you to get started with:


How much milk are you using?
@Anita Chamblee, I usually make 6-8 cups of milk into yogurt at a time. In these pictures I think it was 6 cups of milk.
I had always sweetened my yogurt, added vanilla, etc. after letting it sit the 8ish hours and before putting it in the fridge. Sometimes I end up with really runny yogurt, so maybe this is my problem. However, I often have a good bit of whey on top and your photo doesn’t appear to have any, so do you drain yours off or mix it in?
Thank you for the detailed instructions. I was making crock pot yogurt but not getting consistent results. Now I make it with powdered milk and am finding it a bit thin. I’m going to try it your way and watch the temps on my milk better. Thank you for the great post 🙂
PS ~ We love to eat our yogurt with honey, or swirled with apple butter 🙂
Wait, so what is the crockpot for? I don’t see a step where you turn it on, so is it just a container to hold the yogurt? Would a stockpot or large mixing bowl do as well?
@Hannah, She turned it on at the very beginning to let it heat up. 🙂
@Hannah,
Step 1 says to turn it on to get warm before starting.
Have you ever made yogurt from raw milk and kept it raw (not heating it above 117)? That is what I have been experimenting with lately. I find the only way to get a nice thick yogurt is to drain it in a cloth for a few hours… which is a bit time consuming. Wondering if there are any times out there for raw yogurt.
@Katie,
I’ve had luck lately with raw yogurt incubated right in the jar at 100F in an Excalibur dehydrator. You could also keep it at about 100 in a cooler next to a pot of boiling hot water. (more info here: http://www.kitchenstewardship.com/2009/04/13/monday-mission-homemade-yogurt-the-easy-way/)
Good luck! 🙂 Katie
@Katie @ Kitchen Stewardship, I’m glad to know that your dehydrator worked well for you. I used to use the oven light method, and in our new home the oven light is broken. I’ve been trying the crockpot method with success, but I do miss being able to make it straight in the jars. I think I’ll give my dehydrator a try.
@Stephanie @ Keeper of the Home,
i found the best way to get thick creamy raw milk yogurt is to MAKE IT RIGHT AWAY! i mean, within a day of getting it from the farm…the longer you wait, the less consistent results i have found! i use a method similar to above, and this is the only thing i have found to help make good raw milk yogurt. hope this helps.
Thank you for posting this super easy method! I am empowered and excited to make my own batch!!
Do you use raw milk? If not, do you know if there is anything different that you have to do?
I used to do the crockpot thing, then I discovered viili yogurt from Cultures for Health, which cultures at room temperature. Nothing could be simpler! You can even make pain-free raw milk yogurt!
I used to do the crockpot thing, then I discovered viili yogurt from Cultures for Health, which cultures at room temperature. Nothing could be simpler! You can even make pain-free raw milk yogurt! I actually wrote a couple of posts about it on my blog: http://hippie-status.blogspot.com/2011/01/viili-fy-your-yogurt-part-1.html
I’ve been making our own raw milk yogurt for a while using the Cultures for Health Viili starter and it’s wonderful. I’m amazed at how strong the mother culture has remained. If only I could make raw milk Greek yogurt without heating the milk to 180 degrees! I posted on organizing cultures and supplies today on my blog if it would help anyone. I found that culturing is easy, but remembering to feed the mother culture was a challenge!
The Black Bean Hummus recipe looks wonderful; I look forward to giving it a try.
Lately I’ve been enjoying my yogurt with a bit of maple syrup… yum!
this had been on my to-do list entirely too long! if i didn’t have a chicken in my crock pot i’d do it right now:)
i actually bought a heating pad because i read a recipe that use it, but you’re selling me on the crock pot…
@suzannah {so much shouting, so much laughter}, Another option is to do it in the oven, using the oven light (but not actually turning the oven heat on). You can read about how I do it in this older post of mine:
https://keeperofthehome.org/2007/11/making-homemade-yogurt.html
(Sorry, the images are gone because it was written on my first blog, before it was all moved over to the new site)
I’ve just started using the crockpot method myself the last few months because in our new house, the oven light is broken. It definitely works well. The only reason I preferred the oven method is because I just poured it straight into jars, and then put the jars right into the fridge (no need for transferring to jars after it’s made or cleaning out a crockpot).
@suzannah {so much shouting, so much laughter},
Suzannah,
You can still get good use out of your heating pad if you make your own bread! I use my heating pad on low as a “warm place” while my dough is rising.
You can also use a heating pad to make yogurt–if you don’t have a big enough family to need a whole crock pot of yogurt. Just follow the same basic steps, but instead of pouring the yogurt into a crock pot, pour it into a quart-sized jar (I use 3 1/2 cups milk to 2 Tbs. of yogurt starter), put a lid on the jar and wrap the jar in a towel. Place on a heating pad (set on med-high, depending on your heating pad) and leave for 8-12 hours. I find it works best if I put a glass or something on two sides of the heating pad to make it kind of wrap around the edges of the jar.
Another thing: every few months, I make an entire batch of yogurt to use as “starter”. I then freeze it in ice-cube trays (ice-cubes are generally 2 Tbs. sized), and then pop them out and put in small plastic baggies. I usually put 3 yogurt cubes per baggie, and then store all the baggies in a larger ziploc bag. It is easy to pop out a yogurt cube whenever you need one; just remember to let it thaw for 2-3 hours on the countertop before you are ready to use it (or you can thaw it overnight in the fridge). One more note: if you are using yogurt as a starter, it tends to weaken after many batches. So I occasionally buy a fresh container of yogurt at the health food store (about once every 5 years), and freeze that entire batch into yogurt cubes (you will get approx 30 cubes per 32 oz. container of yogurt). I then label my cubes so that I know how many “generations” it is from the original–Original, 2nd, 3rd, etc.. I find that much past the 3rd generation out, and I can start to notice a difference in my yogurt quality. But if you do the math, 30 batches of yogurt from the first generation, and then up to 30 batches from each of those cubes for the second generation … depending on how often you make yogurt, you can go a LONG time before needing to buy anymore fresh yogurt. (As I mentioned, for me, making yogurt 1-2x per week, it was about 5 years.)
Can you use a milk alternative such as coconut or almond milk for this recipe?
This is awesome. I have been making homemade yogurt for a while now but I’ve never seen this way of making it. In fact, I’m due to make some this weekend – and I think I found my way of making it.
Sandra
so, can you use skim milk, and how much milk do you use?
I used to do the crock pot yogurt too, but now I do it in my dehydrator! So easy. I have an excalabur 9 tray. I do 4 two quart jars and one 1 quart jar all at once. so easy. i heat it up to 110 degrees and add culture put in jars and forget about it for 12-24 hours. Very thick yummy raw yogurt!
When I was in college I had a mild case of lactose intolerance. I used yogurt like Lactaid (ate it before I had dairy), and after 6 months or a year, I didn’t even need to do that anymore. Now I can eat dairy just fine, unless I haven’t had yogurt for a long time and have had a lot of dairy. Yogurt is amazing. And thanks for the clear pictures of how to do this in a crockpot!
I use the simplest version of Katie at Kitchen Stewardship’s method for making yogurt. I love having no extra dirty dishes, and no pouring milk except once into the jars. She gives very detailed directions here http://www.kitchenstewardship.com/2009/04/13/monday-mission-homemade-yogurt-the-easy-way/ I have all the steps timed now, so just set my timer to remind me of each step. I use a combination of Fage Greek yogurt and Stonyfield Farms yogurt for the starter to get the maximum number of good bacteria. Adding the Greek yogurt has made my yogurt much thicker and milder even with a long incubation of 12-16 hours. Even the daughter who doesn’t like yogurt much will eat it now.
@Katherine, Thanks for this link! I think this might be the method for me!
I just started making homemade yogurt and I am wondering how everyone waits so long for the milk to heat. I usually set the heat on the stove at a 3-4 (med/low) and it can take up to 45 minutes. I can’t keep stirring constantly to avoid the layer of milk forming (not quite burnt) on the bottom of the pan. Is this supposed to happen (it’s really hard to clean!)?
I do crockpot yogurt but my method is a bit simpler. 8 cups milk in crock pot on warm for 2.5 hrs, turn off for 3 hrs, mix in 4 TBS yogurt, wrap with big bath towel and leave for 5-10 hrs, put crock in fridge overnight. Then there is only one dish to clean 🙂 and no almost burnt milk because you had to go take care of your kids and couldn’t stir constantly 🙂 My yogurt turns out really thick but gets thinner when I stir jam or honey into it to sweeten. Even store yogurt does that though.
@Lori,
I have just started making yogurt and still experimenting, but I’ve found that I can heat the milk in a bowl over a pan of boiling water – usually I do this while I am cooking brown rice anyway, as there is plenty of time to get everything ready while it cooks, and then I can have it all ready and resting before we sit down to dinner.
I must try the slowcooker method, I’ve only managed a very runny yogurt so far, but it was great once I’d strained it.
I’ve been wanting to try this for a long while now!
Can Greek Yogurt be used as a starter?
And does it matter what kind of milk is used (skim, 2%, whole)? I’d prefer to have non-fat yogurt for myself but wouldn’t want to compromise integrity.
@Brittany, I always recommend whole milk, but you can make yogurt with any type of milk, really.
And yes, you can use unflavored greek yogurt as a starter.
@Stephanie @ Keeper of the Home,
However, if you use Greek Yogurt as a starter, don’t expect to get thicker yogurt. It will turn out the same. To get a Greek-style yogurt, you must strain out some of the whey.
@Erin C, That’s a good point. Sometimes I just use regular yogurt, not Greek, and I’m sure that it does make a difference. Point noted! 🙂
I don’t like the texture of regular yogurt so I typically buy the whipped kind. Is there a method for making homemade whipped yogurt?
I use a cooler to culture the yogurt. I put the heated, cooled milk with the starter into jars into the cooler with a heated rice bag (or water bottle.) If I let is culture a short time, I don’t have to do anything but if I let it go 24 hours then I have to re-heat the bag. Then all I have to do it put the jars into the fridge to cool it. It’s always fun and educational to read how other people make their yogurt.
Does anyone know about doing this with almond, coconut or hemp milk? We are allergic to dairy and really miss yogurt!!
I believe you can do it with any of those milks but you have to buy new starter more often ’cause the yogurt gets weaker faster. You would have to buy an actual starter or find a real yogurt made from those milks too. I would google it. I know I’ve read in quite a few places that is can be done I just don’t remember which blogs sorry.
@katherine, check the cultures for health website I do believe that I saw some ways to make non dairy yogurts and such there.
Does anyone know about making yogurt with almond, coconut or hemp milk? We are allergic to dairy and really miss yogurt!!
I sweeten my homemade yogurt with frozen fruit juice concentrate and then make frozen yogurt pops. When I use frozen orange juice, I add a little vanilla extract.
I make homemade yogurt in the crockpot from start to finish. I’m going to add you Step #7 though – to see if it makes it thicker. It definitely makes sense that it would and the semi-runny factor is one thing I don’t like about it. Thanks for sharing!
An old Assyrian woman taught me how to make homemade yogurt many years ago. I’ve tried several methods since, and my favorite (for convenience sake and creaminess) is the one I share here: http://likeabubblingbrook.com/2011/03/how-to-make-creamy-homemade-yogurt/
Like you, I also use a quality, store bought yogurt to start my batch.
I have some recipes on my site, but we like to add the yogurt into our smoothies, some dips (beet dip!), or just with a simple bowl of fruit. Yum!
What kind of milk is best to use? I buy Stonyfield whole milk yogurt, but I’ve been wanting to make my own yogurt. I just don’t know what type of milk to buy. Any suggestions?
I’m definitely going to try this, thank you for the detailed steps!
I’m a happy subscriber. 🙂
I’m intrigued by the whole idea of sourdough. It seems like it would be a good way to keep bread on the table. I’m a little intimidated by the idea, but I know a good book would inspire me! 🙂
Thanks for the inspiration to finally try making this. I followed the steps but my yogurt turned out really runny – Any clues on why that is? I will try again but would like to avoid it being so runny if I can. It also looks a little grainy – no clue why that is. Tastes fine though. I have been straining it to thicken it, but just one more step which I would like to avoid in the long haul. Love your blog!
Trying to figure out if I am missing something but what amount of yogurt do you use for your starter if you are going the store bought way. I have tried and failed other methods too many times and would really like to see this work- even if it is just for bragging rights! 🙂
@Mary Kathryn, She said 2 Tbsp per 4 cups of milk, but I used 2 Tbsp and 3 1/2 cups milk and got great results.
@Taressa,
Yup! http://blog.tfrecipes.com/2011/02/03/coconut-milk-yogurt-2/
I am new to your blog. I just wanted to say that I am really enjoying it. I am trying to become “frugally green” as well. I love yogurt and I am definately going to try this recipe. Thank you for taking the time to teach these helpful and money saving ideas. Sincerely, Teresa D.
@Teresa, Welcome, Teresa! I’m so glad to have you here! 🙂 You might be happy to know that in May, we’re going to focus specifically on frugality.
I was so excited last week because I followed this recipe and finally turned out a normal yogurt! I thought I had finally found a way to make it turn out. (I’ve tried various other recipes in the “oven” and crock pot in the past and never had solid yogurt. It always turns out runny and stringy.) The kids ate the good stuff all up, and I tried it again this week and was so sad to find runny, stringy yogurt again. Could anyone give me an idea what I might be doing wrong? The only variables that I had from the first batch to the second batch was that I used a store bought yogurt for starter the first time, and my own starter from the last batch for the second one. I also made 5 cups the first time and 6 cups the second, but I adjusted the amount of starter appropriately.
I’m making a 3rd batch today…crossing my fingers. 🙂
I’ve had the same problems too. My first batch was great, my last two were almost the consistency of milk. If it tastes like yogurt, its still good though, so don’t throw it out! I blended frozen fruit into the liquid and got yogurt smoothies. I’m trying to figure out what I did too, and my guess for me is that I didn’t let it cool long enough. I let the first batch sit almost a whole 24 hours in the fridge, the last two I stirred after 8 hours. I also read that when you heat your milk up, if you keep it at 185 degrees for 30 minutes before cooling, you’ll get thicker yogurt. I did this the first time but not the last two times, so maybe that’s it too.
Yay! A yogurt method that doesn’t scare me. 😉 I’ll be trying this very soon.
One way to use yogurt is to salt and pepper chicken breasts, then coat them with yogurt and bake at 350 until cooked through. It keeps the chicken so juicy! Add fresh rosemary and lemon juice if you feel like it.
Thanks for posting this recipe! I made it yesterday and it was a success!
i tried your recipe, feeling very skeptical as i’m not much of a cook. my yogurt came out perfect! it is delicious. i used organic, nonfat milk and organic starter. i also strained it overnight, creating a thick, smooth Greek style product. it is so much better than what i’ve been paying four times as much for at the market. thanks for the recipe and the photos.
Woohoo! I made it overnight and it turned out perfectly. After adding the starter, I poured it into pint jars which I set in the slow cooker (mine is not really a crock pot) and wrapped in towels. I left it about 12 hours than put the jars in the fridge. Lovely!
Question? How do I know if my homemade yogurt has enough of its good bacteria? thanks, Olga
I have been trying to find out how do make vanilla flavored yogurt for a long time. I know I have asked this question on other sites, but I’ve never gotten a good answer. My kids will ONLY eat vanilla yogurt. I know that vanilla with alcohol in it will kill the good bacteria. I have found alcohol free extract, but I have no idea at what point or how much to use it. I don’t want to waste anymore ingredients trying. Do you have any tips?
Thanks
Linda
I sweeten mine with maple syrup and find it tastes a lot like vanilla yogurt.
I have a huge variety of organic extracts that I use (from spice barn) for everything imaginable under the sun. We have 3 boys who each like something different, so what I did was I made the yogurt and let it cool down completely, then sweetened it with splenda so that it was just plain sweet yogurt. I portioned it all up, and then at each meal I asked the boys what flavor they would like (the popular ones were vanilla, root beer, orange and butter pecan). I started each portion with a capful of extract, tasted it and added as needed. That worked well for me. These last few weeks we’ve been blending frozen smoothie fruits into the yogurt.
I flavor all my yogurt with vanilla flavored liquid stevia. There are several brands available at health food stores and they usually come in a little glass bottle with an eyedropper. For my taste, 3-4 drops of the stevia to around 1 cup of yogurt is good. It adds great flavor with no calories!
Just wanted to say what a blessing your blog is to me…thank you for the time and effort you bring!
I tried the yogurt last night, and it came out thick and creamy (I started with raw, whole milk and used Stonyfield Plain Organic/Whole Milk Yogurt as the starter). I left it in the crock pot overnight, so about 12 hours. One thing that surprised me was the flavor…it was really mild; almost no flavor at all! Not that it’s a bad thing, since we tend to flavor it before serving, anyway, but I’m wondering if this is normal or if it got cold too fast.
Any thoughts? Thanks! : )
My dad started me on homemade yogurt when i was a little girl. one thing we used to “sweeten” it up was fruit baby food- there are so many different flavors available. Always loved the blueberry – but peach was pretty darn good too.
Quick question…although I didn’t make mine in a crock pot I just got a “yogurt maker”. While the yogurt itself appears quite solid there is lots of clear “whey” in the containers….is this normal? Do I just pour this off or leave it and mix it in when I eat the yogurt after it cools. I’m unsure if this is ok to eat…..thank you for any answers to this.
I mixed it back in. It has a tart flavor, but I suppose you could take it out if you didn’t want that flavor. My rule for any food is if it was covered in the fridge and now has liquid on top, just mix it in. Same goes with sour cream, store yogurt, ketchup, etc.
An easy way to cool the yogurt precursor after the initial heating the milk is to just place some ice cubes in Zip-Loc bags and place this in the cooking pot while stirring. This is much quicker than just waiting for the milk to cool naturally.
So I just tried making my first batch of yogurt. I heated, cooled, mixed everything according to recipe, measuring with my new candy thermometer.
Then I poured it into a large jar, wrapped the jar with a couple towels, tucked it into my heated up crock pot and hoped that would do the job overnight. In the morning I popped it into my fridge and now a day later I’m finding that it definitely did not set up.. 🙁 It’s a little thicker than milk but not by much.
Wondering if any of these factors were part of the reason:
I put the lid on the jar before I wrapped it with towels, perhaps not allowing the yogurt inside to breathe?
I wasn’t able to put the lid on the crockpot because the jar was too tall, but I definitely had that puppy tucked with towels to hold the heat.. It was pretty chilled down in the morning when I came down, though, so I wonder if it had enough heat the whole night.
Maybe too much heat in the beginning? I had the crockpot on high to warm up then turned it off before I put the toweled jar in. I thought the towels would insulate it well but… maybe it was too inconsistent?
The milk and yogurt-starter was from a local dairy farm, the kind that comes fresh in a glass jar, but I bought it a week ago.
I used whole milk with a cream top so I doubt the acidophilus went hungry, but I added no extra sugars..
Not giving up just a little bummed. Maybe next time I will try the hot water bottle in the cooler method. Heat the cooler up with hot water first, get it nice and warm in there? Seems like there should be an easier way- how did folk do it back in history?
My guess would be either that it was too hot to start out, which would weaken the bacteria before they really got growing, OR that it cooled down too much in the night and didn’t allow enough time for the bacteria to grow sufficiently to thicken it properly. Or maybe a combination of both? Other than that, everything sounds pretty good. Don’t feel too bad- most of us mess up our first couple of batches to some degree. I did. 🙂 But as long as it did culture, you can still use it as a liquid yogurt, for things like fruit smoothies, so it’s not a waste, anyways.
Too hot might have killed the bacteria. But for next time, I also used canning jars and it turned out GREAT! They even sealed themselves overnight, so there “goes” the “not breathing” theory. 🙂 This last time I used the ice cubes-in-a-bag cool down and it REALLY thickened up nicely. This was my BEST batch yet! (And best I’ve ever tasted!) I wanted to add that I laid my bigger (quart) jar down on it’s side so that I could get the c.p. lid on. Then I put upright in the frig. in the morning. The towel goes over the WHOLE crock pot, not individually. Hope that helps! 🙂
I liked it , very educative. I will try it out
LOVE this recipe! Thanks so much for the detail and pictures! People are so impressed when I say I may my own yogurt…ha ha! This last time I tried “Ron”s way of cooling the milk (with ice cubes in a ziploc) and it was SO fast. Then I poured cooled milk into 1 quart jar and 3 half pint jars, put the lids on, placed them all in the warmed crock pot, turned it off, put the lid on (they all fit nicely), and wrapped the towel. Then I’ll take out the jars in the morning and just place those in the frig. instead of having to place the whole crock pot. (And without disturbing) I have been using raw milk like some of the other readers, too. Wonder if the whole milk is why ours turns out and other people’s are runny??? Thanks again! Your website is great!
Thanks so much for sharing this recipe. I’ve been making homemade yogurt on and off for a while now, but have had a few problems with it not being thick enough lately. I’m going to try this idea of using the crockpot. Thanks for sharing 🙂
I too have been making yogurt for a few years but I set it in my warmed oven with the light on for the day. But my last attempt failed and I don’t know why. It tried to yogurt but was very watery after the normal 8 hours in the oven. My starter came out of the freezer like usual. I use unflavored gelatin for a thickener. Have any ideas what went wrong?
I make yogurt regularly…the other day I was trying to do too many things and did the whole process but forgot to mix in the yogurt….the milk set up like yogurt , but obviously doesn’t have the culture in it….can I use it for anything else…is it safe/unsafe to consure? Any ideas?
Did you find out an answer for your post? I did the same thing last night!
Emily, you are an inspiration to homemakers! I raised three children on homemade yogurt, which probably saved us enough in groceries each week to pay for a family camping vacation every summer. For readers who are having issues with watery yogurt, consider how much starter you’re adding. Too much culture will make the final product very thin. If you ruin a batch, whip up some kefir, which is basically a yogurt drink blended with fresh fruit.
I’ve been making this for over a year, and I always forgot to stop and say thanks for the great recipe. Homemade yoghurt is the best, and this crockpot method is so quick and easy. Thanks for sharing with us!
Wonderful, thick and creamy yogurt. This is such a simple method I am planning to make it each week. I made a gallon of it last night (8 mouths to feed) and it worked out perfect!
Thank you for this recipe.
Have you tried making kefir with your crock pot? I LOVE the Redwood Hill Goat Milk Kefir but for the life of me I have not been able to replicate its delicious creaminess.
after reading I managed to make yogurt successfully
Thanks so much for sharing this recipe! I’ve never made yogurt because I don’t have a yogurt maker, I didn’t know it could be made in a crockpot!
My milk burnt a little during the process and the yogurt has a slight burnt taste to it. Is that unsafe to consume or will it just taste bad? I’d still like to eat it for the cultures if possible. Thanks.
It’s not unsafe, it just won’t taste quite as good. I’ve done it many times. 🙂
I burnt my milk too, can I use it for a starter for my next batch or will the next batch taste burnt too.
I am excited to try this recipe. Do you know if there is a way to make flavored yogurt? Could I use vanilla yogurt as a starter or does it have to be plain? I’m new to making homemade yogurt and just wanted to check. Thanks for the recipe!
Use plain yogurt as a starter. To make flavored yogurt add whatever flavorings (and sweetener if desired) after your yogurt is done, or right before consuming, whichever is easier for you. But don’t try to flavor it until you are done with the whole process.
I can wait to try to make it.. But I have a question.. When do I use the starter .. Did I missed that part? I don’t see it in the receipe .. Thanks
Do you have to store it in your crockpot after your finished making it ?
No, you can transfer it to a bowl or a jar to put it in the fridge.
I have another question :),
what type of milk is used?
I drink only Soy and my family drinks 1%?
Dont know about soy but I use skimmed milk … that works great for a fat free yoghurt so 1% should also be fine
I’ve tried making yogurt using different methods including this one. But no matter which method I try, my yogurt always ends up with little tiny chunks in it. Reminds me a little of teeny tiny cottage cheese chunks. It tastes and smells like yogurt, but I am scared to eat it incase there is something wrong with it. I always use fresh milk and yogurt, and follow the recipe directions.
Has this ever happened to anyone?
Hi Sarah,
I have been making yogurt for a while now. When I first started I had this issue. The little chunks are fine to eat. I found that whenever I over heated the milk, these little chunks would form. Once I figured that out, I only bring up the milk to 180 degrees F so that I had a little wiggle room in case it got too hot. After I figured that out I haven’t had grainy yogurt since.
In addition, I found that once you get the milk to 180, if you hold the temperature there for at least 10-20 minutes, the yogurt comes out thicker. Holding the temperature at 180 allows the protein lacto-globulin to denature and thus makes a thicker yogurt.
Hope this helps.
Wali
The thought of heating milk to that point kinda makes me gloomey. I use raw milk and when you heat it you destroy all the good thuings…so to say the least I don’t understand how it can be good for you
Dianna, when you heat it, you kill any cultures that have entered to that point, giving the yogurt all the space and food to grow and spread.
Dianna, the recipe in the GAPS book by Natasha Campbell-McBride says that you don’t have to heat raw milk to make yogurt. But, since raw milk has its own bacteria in it, the resulting yogurt might be more sour or lumpy or liquid than you like. Gentle heating would be OK if you want consistant results and it’s not as bad for the milk as commercial pasteurization. So, If you’re flexible about how the yogurt turns out, you don’t have to heat it. If you have picky eaters at home, then heating it is the way to go.
hi Emily
If the yogurt doesn’t seem to be setting have you ever added more starter yogurt after a few hours? Does it work?
I’m trying this method. Excited to see how it turns out. I used to make Kefir just by adding the culture you mentioned to a glass of milk on the counter. Leave it for 18 hours and come back and it’s kefir. You have to fish your culture out every time but you don’t have to keep buying a jar of yogurt to add to the batch. Also if you leave it longer and then strain it you get a very mild bland cheese or tofu like block that you can cook with. Kinda like paneer. This awesome Russian lady shared a piece of hers with me but this is basically what she gave me were the milk kefir grains from culture for health website
Thanks for the recipe. Fun to play. 🙂
What happens if you let the yogurt process too long? I made yogurt yesterday afternoon, and I forgot to put it into the fridge before I went to bed. When I woke up in the morning I remembered- but it had processed for 15 hours- is it bad?
No its still good if you can eat it .. with a long processing time it becomes really sour
Thank you for the recipe. I live in South America and unfortunately haven’t found a crock pot in stores here. I put the milk in a thermos and the yogurt turned out great.
my yogurt was very thin, thicker than milk, but thin. It also is clumpy, thin clumps. what could I have done wrong? will try again, but what should I do with this batch. It is small, but is it edible?
Yes, it’s still edible. I would use it for things like blended fruit smoothies. I would double check that your milk wasn’t too hot when you started (because that can kill some of the bacteria before it has time to start multiplying). Other things to consider are that it stayed warm enough over night (maybe wrap your crockpot in an extra blanket next time?) and also leaving it long enough. I personally usually leave mine 8-12 hours, just to ensure thickness and a really good culture.
At Sandra B, I also make yogurt from home, and what I do once my yogurt has sat for 6-8 hrs, I than strain it through a tea towel for about 20-30 min. If you want creame cheese you strain it for six-8 hours in a HANGING tea towel. Hope that helps.
If I make homemade yogurt pops using this recipe…does anyone know how long before they expire? Thanks! Looking forward to making a batch.
Hi there!! Do you have any idea if i could make this dairy free? With either soy or a nut milk?? I would love to have yogurt again 🙂 Thanks!
Why is fruit and sugar added after the yogurt is already made?
Adding it to the process of making it would get in the way of the beneficial bacteria being able to grow and multiply properly. The yogurt just wouldn’t culture or set right, and the texture and taste would be off. It works much better to make your yogurt first, then just add whatever kinds of sweeteners, fruit, fixing, etc. that you prefer afterwards.
I came across your website, saw your recipe for homemade yogurt, and tried it! I am happy to report that my yogurt turned out wonderfully! Mine had a bit of a bite to it as plain yogurt often will, but it made me realize how much sweetener must be added to make even the store bought vanilla flavor taste sweet. I like having control over how much sweetener and fruit is added. Thankyou for this recipe.
I FOLLOWED THIS RECIEPE TO THE LETTER AND IT TURNED OUT RUNNY. WHAT DID I DO WRONG?
Thank you so much for posting this very helpful article!! I made yogurt at home for the first time with my family this weekend. It was absolutely fabulous and a lot easier than I thought it would be. Thank you so much!
This recipe sounds great & i’m very excited to give it a try. I have some vanilla flavored yogurt right now I could use as a starter but I saw you said it needs to be plain, is there a reason for that?
I just made your yogurt recipe. It came out wonderful, thick and tastey. How long will the starter last before it goes bad. I’m thinking in 14 days it will be no good. I will need to start another batch before then. Is this right? Thanks for the infor. Love your site, so full of interesting things!
I’ve read through you recipe several times and don’t see the amount of milk you use. I’m guessing it’s a quart. I’ve been trying to make yogurt using an electric yogurt maker and it never gets thick in fact the combined ingredients are thicker at the start than the finished product. If I strain the yogurt I end up with mostly whey and very little yogurt. (I use 1 qt of milk).
Any advise is greatly appreciated.
I also would love to try this but do not see how much milk. This would be my first time to make homemade yogurt so have no clue 🙂
She didn’t write an amount, because it really doesn’t matter. The only thing that matters is the proportion of “starter” yogurt. Somewhere up there she says it. I have made it so many times now, I just take a huge spoonful of yogurt to every quart I’m making. I like to pour my “pre” yogurt into canning jars before I put them into the crockpot overnight. So to know how much milk to use, I pour milk into the jars that will nicely fit into my crock pot, THEN pour that amount of milk into my cooking pot to start cooking. Then when I pour it back, there is no waste…it’s exactly the amount I need. Best wishes! This is a great recipe! I have it marked in my “favorites” and come back often as a refresher.
My favorite way to eat yogurt is to mix it with an organic granola and eat it as a breakfast-like cereal. I can’t wait to try this recipe with my home-made granola!
Thank you for posting this. I’ve never made yogurt but I followed your recipe and it turned out perfectly. I drained it and have the thickest and creamiest Greek yogurt. For under two dollars!
If the yogurt says contains active yogurt culture, is that still good?
Thanks for the crock pot yogurt recipee! Where I live in Indonesia it’s about $8.50 for a quart of plain imported yogurt, or 150ml (2/3cup)-containers of local-made yogurt for about $1 each. Last night I found and followed this recipee, using 7 cups of recontsituted full cream powdered milk, one cup fresh milk, and 1/2 cup yogurt starter ($4 of milk). My yogurt in the past always needed straininng, but this morning 8 cups of lovely thick yogurt filled my crockpot! New, local, yummy, economic way to live. Terima kasih!
Hey Annie, I live in Jakarta! Did you buy your crockpot here? If so, where? Thx!
I’ve been using reserved home-made yogurt for my starter, and my yogurt seems to get thinner as I go (it’s always been thin, but now even moreso, and it doesn’t seem to be straining at all). This last time was my 3rd batch after re-starting with store-bought yogurt. Any ideas?
I followed the directions EXACTLY and ended up with something that smells like yogurt, but is the same consistency as milk. Extremely frustrating. I warmed up the crockpot, used 4 cups of milk and two tablespoons of starter, checked the temp with a thermometer to make sure it hit 185* on the stove and then 100* in the sink. I put two heavy towels around the unplugged crockpot, let it sit for about 9 hours, and then let it cool in the refrigerator. What did I do wrong?
Maybe something is wrong with your thermometer? Try using her tips instead (milk starts frothing and bubbling, put clean pinky in milk)
Jamie, did you add the starter to the four cups of milk and then heat it to 185 degrees on the stove? If so, that is the error. Heat the milk alone , then let it cool down to between 100-110 degrees before adding the starter and then letting this all sit in your crockpot. I have also added a tablespoon or two of powdered milk to my milk before heating it, if it was non fat milk, to increase the protein and firm up the yogurt. Hope this helps.
The same thing happened to me and I followed the recipe, I heated the milk alone and followed the tips instead of going by the exact temperatures. Any other suggestions?
This is my favorite homemade yogurt recipe EVER! I actually jumped up and down and squealed with delight when I saw how thick it turned out. Thank you!!
Thank you my first batch of yogurt came out beautifully. If I want to add vanilla and honey can I do during the process or do I need to wait until it’s set?
I’m sorry if this has been mentioned already, but can I use 1% or 2% milk? The recipe I have been using calls for half and half and whole milk.
We use and drink only raw milk because it is readily available to us. Could this recipe also work for raw milk? I can’t wait to try it. We seem to spend over $40 a month just on yogurt alone. My kids can’t get enough!
Hi! I recently found your blog doing a search for homemade yogurt. I have made it before but it was really runny. Following your directions has really helped. It’s actually the consistency of store bought natural yogurt!
I have started a routine of making it in the morning (around 7ish) and then it’s “done” by dinner time. Like you suggested, I stored it in the fridge and it has the whole night to set. I love it!
I first tried sweetening it with vanilla extract and agave. I wasn’t too crazy about it. This time I only sweetened it (without the vanilla) using Sun Crystals (half sugar in raw, half stevia) and it’s awesome! I sweetened the whole batch at once.
I want to try those syrups that starbucks uses to flavor coffees. I THINK they are all natural, not sure though. I have to look at them, they are in the coffee aisle. There is also flavored agave that I would like to try along with trying to make my own “fruit on the bottom” yogurt…I wonder if you can just use fruit preserves? Would it taste just like jelly though? Not sure.
Anyways! Thank you SO much for posting this. I stopped buying yogurt because we couldn’t afford it. But now I can make my own! A gallon of milk is cheaper than buying a container of yogurt…and you get so much more!!!
Can I use lactose free milk?
From what I understand of the process, the cultures actually eat the lactose. You would probably have to add an additional sugar for them to eat in order for this to work. However, because the cultures process the lactose, yogurt usually contains less lactose than milk. I know some people who can eat yogurt but not drink a glass of milk. You can try it and reply here. Or use half lactose free and half regular milk. humm. Now I’m curious.
I’m really interested in making this since my kids love yogurt! It is for my kids so I would need to sweeten it close to what it’s like in stores. Do you have any suggestions on what to use and how much? Thanks!!
Your tip about the foam doesn’t seem to work at high altitude. My milk foams at about 150F. (Water boils lower than 100C as well…) So those of us living in the mountains need a thermometer. But I follow this process every time. I keep a starter from my previous batch in the freezer. And I love turning this yogurt into frozen yogurt. Delicious with blueberries!
How much yogurt does this produce? Thanks!
I’ve tried your recipe twice in the last two days and it didn’t work either time…very frustrating! The first time I
used organic 1% milk and no thermometer (I used your tips) and the second time I used organic whole milk and and instant read thermometer. Both times I used 2% yougurt.
Can you help??