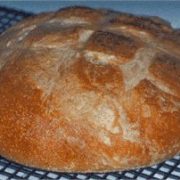
Simple Whole Wheat Bread Recipe
Servings: 0
Ingredients
Instructions
Combining the ingredients:
- Stir1 egg, 1/3 cup oil, 1/3 cup honey & 2 cups hot tap water into bread machine pan.
- Add 2 tsp. salt, 1 Tbsp lecithin & (optional) 2 tsp +/- gluten.
- Grind 1/4 cup flax seed in a coffee grinder & add to mixture. Stir well.
- Add 3 cups freshly milled wheat flour to top of mixture and make a "little well" in the middle of the flour with your finger. Put 3 1/2 tsp instant yeast into the "little well" then cover the yeast with another cup of flour.
Preparing the dough:
- Set your bread machine for the dough cycle & allow it to begin mixing your ingredients. (I make my bread machine do all the hard work of mixing the ingredients, however, this can also be done by hand or with a stand alone mixer.)
- Slowly add another 2 to 2 1/2 cups wheat flour to the dough. (Depending on the weather, you will need more or less flour every time you make your bread. The more humid the air, the more flour you will need.) Use a spatula to scrape the excess off the sides of the bread machine pan & close the lid to allow the dough to rise. (If you're not using a bread machine, be sure to put your dough in a bowl & cover it with a damp towel. Place the bowl somewhere still (no drafts) & warm. Let it rise until it doubles in size. The bread machine top with open slightly toward the end of the rise. There is no need for alarm if this happens.
- Just before the first rise is finished, clear off your counter top and wash and dry it well. (This is also a good time to remove any rings from your fingers & pull your hair back again.) Then put a bit of olive oil on the counter top and smooth it around. (I also get my bread pans ready at this time with a coat of olive oil.)
- Once the first rise is finished, run your hands across your oiled counter top to keep the dough from sticking to your fingers, then take the dough out of the machine and divide it into two equal sections. Using your hands, roll it around into a ball and then roll it out into a thick cylinder.
- Tuck both ends of the cylinder under and put the dough in the pan with the tucked side down(Below you can see the loaf on the right is tucked.)The next picture is a shot looking down on the dough once it is first placed into the bread pan. Note that you can see the bottom of the pan in places.
The 2nd rise:
- Next, you need to find another still (no drafts) area for the second rise. Some people choose to preheat their ovens to about 200°F, turn the oven off and then place the dough inside the oven. Some ovens have a special proofing option which is a wonderful blessing to any bread maker!
- The second rise takes a bit of practice to get the timing just right, but when the dough is done rising, it should be about double the size it was when you started. The pictures below show the dough after the second rise is complete. Compare the fullness of these pictures with the ones above to get a good idea of what to expect from this step. You want to be careful not to leave the dough rising for too long or it will fall. (Yes, this happened to me.) It seems to make the bread a bit tougher which is obviously undesirable.
Baking the dough:
- Finally, preheat your oven to 350°F and bake for 30 minutes. Let it cool for about 5 minutes in the pans then flip it out onto a cooling rack. Once cool (or not - I love warm bread), slice it as thick or thin as desired and enjoy!
Notes
Yields 2 loaves (3 to 3 1/2 lbs total)
